
.svg)









 Affordable Financing
 Fibreglass Pool Install Stages
The day the excavator rolls up is when every pool buyer panics a little. Yesterday, there was a lawn. Today, there is a machine in the backyard, a truck out the front and a growing hole where the kids used to kick a footy.
Knowing what happens next makes the whole process far less stressful.
This guide walks through fibreglass pool installation from the first site checks to final certification. You will learn what happens at each stage, who normally handles it and where extra time or cost can sneak into the project.
The physical installation sequence is similar whether you manage a Complete Fibreglass Pool Kit yourself, use selected trades or engage a licensed local installer. What changes is who coordinates the work, checks each stage and carries the responsibility when something needs sorting out.
|
Quick Answer: What Is the Fibreglass Pool Installation Process? Fibreglass pool installation in Australia generally follows seven main stages:
A straightforward installation may involve around 7 to 14 active working days, usually spread across a three to four-week construction period. The full journey from choosing the pool to the first legal swim commonly takes around 8 to 12 weeks. Council approval, site conditions, weather, trade availability and fencing inspections can all stretch that timeline. The shell can be in the ground quickly. Getting everything around it properly planned, installed and signed off is what takes the extra time |
Fibreglass Pool Installation Stages: The Seven-Step Sequence
Every site is different, but the basic order matters.
You cannot backfill before checking the plumbing. You should not lock the shell in with concrete before it has been levelled. You also cannot leave fencing until the kids are standing beside 300 mm of water asking whether they can jump in.
Here is how a properly planned fibreglass pool installation comes together.

Stage 1: Site Checks, Pool Planning and Approval
Before choosing the final pool position, check what your backyard can realistically handle.
A large lawn does not automatically mean a large pool will fit. Backyards have a habit of looking generous until setbacks, easements, underground pipes, fencing and machinery access all turn up wanting their share.
Start by checking:
-
Clear side or rear access
-
The route for removing excavated soil
-
Overhead powerlines and trees
-
Setbacks from the house and boundaries
-
Easements and underground services
-
The slope and drainage of the block
-
Space for the pool equipment
-
Space for compliant fencing and usable surrounds
A rough string-line mark-out is useful at this stage. It lets you see whether the pool size looks comfortable in the yard before you pay for detailed plans. It also gives everyone in the family a chance to offer an expert opinion based on absolutely no building experience.
Just remember that the shell dimensions are not the whole work area. The excavation is wider, and you still need room for the bond beam, coping, drainage and trades.
Our guide to pool placement setbacks explains the planning distances that may apply around houses, boundaries, trees and easements. These are starting points only. Your council, building surveyor or certifier must confirm what applies to your property.
What Approval Does a Fibreglass Pool Need?
An in-ground pool requires the relevant planning or building approval before excavation starts.
The name of the approval depends on where you live. In New South Wales, for example, the pathway may be a Development Application or Complying Development Certificate. Other states use terms such as Building Permit, Building Approval or Development Approval.
Our pool council approval guide for Australia explains the common pathways in each state and territory.
As a broad 2026 planning allowance, approval, certification and inspection-related costs often sit around $800 to $2,000. Complex sites may cost more if they need engineering, additional reports or planning assessment.
Straightforward private-certifier pathways can take as little as two weeks. Council applications commonly take six to twelve weeks, and site complications can push them beyond that.
Documents may include:
-
A site plan showing the house, boundaries, easements and pool location
-
Pool shell specifications and engineering information
-
Fencing plan compliant with AS 1926.1, the Australian pool barrier (fence) safety standard
-
Soil or geotechnical information where required
-
Drainage or stormwater details where required
-
Other site-specific reports requested by the assessor
Complete Fibreglass Pool Kits provides the shell engineering and relevant product-compliance documents supplied with the kit. We can also refer you to site-plan providers and certifiers where available.
Preliminary Mark-Out Versus Final Set-Out
The first backyard mark-out helps you test the idea.
The final construction set-out is different. It must match the approved plan and show the exact pool position, orientation and levels before excavation begins.
This is not the stage for moving the deep end 600 mm to the left because it looks nicer from the kitchen. Any meaningful change will need to be checked against setbacks, services and the approved documents.
Check Underground Services Before Digging
Lodge a Before You Dig Australia enquiry through byda.com.au before excavation.
BYDA sends your enquiry to participating utility companies (gas, power, water etc) and supplies available plans for free. These plans are an important starting point, but they do not guarantee the exact position or depth of every service.
They may not show:
-
Private gas, water or electrical lines
-
Septic tanks and trench systems
-
Irrigation pipes
-
Old or abandoned services
-
Recent changes
-
Infrastructure belonging to non-participating organisations
That old pipe running diagonally across the yard may not appear on any plan, especially if a previous owner installed it during a productive Sunday afternoon in 1987. If a service sits near the excavation, arrange competent locating or physical verification before excavation starts.
Hitting a gas line or water main is one of the most expensive preventable problems on a pool site. Our pre-excavation underground services checklist explains what BYDA covers, what it may miss and who should take responsibility for the checks.
Stage 2: Excavation and Bedding Preparation
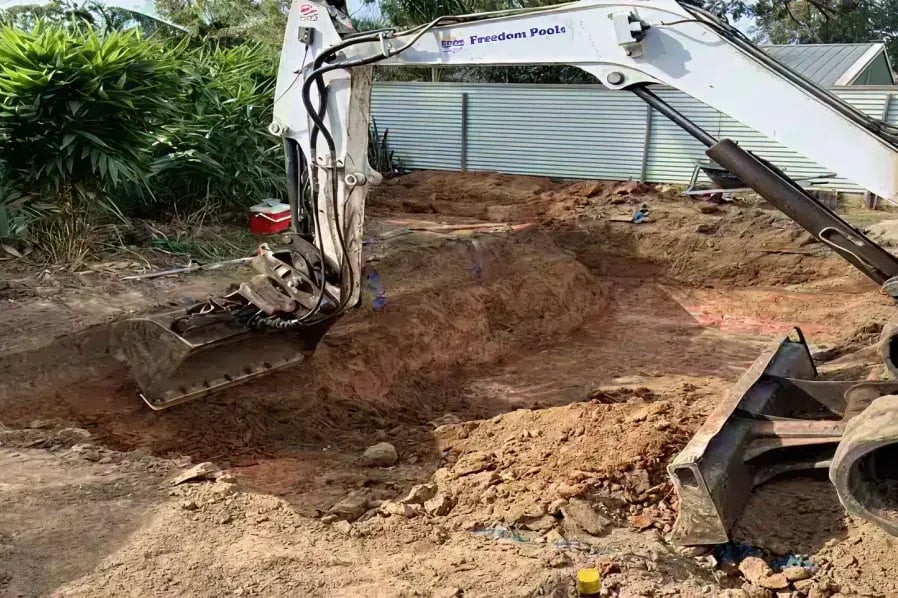
Excavation is the loudest, messiest and most satisfying day of the whole build. One minute you've got a perfectly respectable lawn. The next, there's an excavator parked where the trampoline used to be and the neighbours have suddenly developed a keen interest in what's happening over the fence.
On an accessible site, an excavator digs the pool shape while a bobcat or loader carries the spoil to trucks at the front of the property. The excavation is deliberately larger than the shell so there's room for positioning, plumbing and the backfill that supports the pool once it's in place.
A straightforward excavation may look like this:
-
Early morning: machinery arrives and the final set-out is checked
-
Morning: topsoil is removed and the bulk excavation begins
-
Afternoon: the base is trimmed, levels are checked and loose material is cleaned up
An accessible, uncomplicated pool excavation can often be completed in a day. Larger pools, tight access, unstable soil, rock or slow soil removal may add another day or several days.
One piece of advice we give repeatedly is this:
Don't excavate weeks before your shell is due to arrive.
As a general rule, avoid leaving the hole open for more than two weeks. Heavy rain can soften the base, collapse the sides or fill the excavation with water. Paying for the same hole twice is a fairly ordinary way to start a pool project.
How Much Access Does Excavation Need?
Access is one of the biggest influences on installation cost.
Ideally, you've got around 2.5 to 3 metres of clear side access. That gives machinery enough room to work efficiently and usually keeps excavation costs down.
If your access is narrower, don't panic.
We've seen plenty of successful installations on sites where the first reaction was, "There's no way a pool is fitting back there."
It simply changes how the job gets done.
Depending on the site, that could mean:
-
Smaller excavation equipment
-
More trips to remove soil
-
Partial hand excavation
-
Temporary fence removal
-
Alternative soil-removal equipment
-
More labour and a longer excavation period
Around 900 mm is where normal mechanical excavation options become very limited. That doesn't automatically mean the project stops. It simply means the solution becomes more creative, and usually a little more expensive.
Remember too that access isn't just about width.
Tight corners, retaining walls, air-conditioning units, low eaves, steep slopes, soft ground and the path the spoil has to travel all affect how straightforward the excavation will be.
Our pool installation access requirements guide explains how installers assess difficult sites and the practical solutions that can turn an apparent "no" into a perfectly workable "yes".
What Happens if the Excavator Hits Rock?
Rock is one of the biggest unknowns in swimming pool excavation. Soft or weathered rock may come out with a toothed bucket or ripper. Harder material may need a hydraulic breaker, rock saw or different machine.
The cost depends on:
-
Rock type and hardness
-
How much of the pool footprint it covers
-
Excavator size
-
Site access
-
Extra machinery time
-
Trucking and disposal
-
Noise or working-hour restrictions
A small patch might add a few hundred dollars. A large rock shelf can add several thousand dollars or more.
Known rock areas include parts of Sydney, Brisbane, Melbourne, Adelaide and many regional locations, but conditions can vary between neighbouring blocks.
A geotechnical report may cost around $600 to $900 for a typical residential site. It cannot remove every surprise, but it can help identify rock, soil and groundwater risks before excavation.
Check whether your excavation quote includes rock, excludes it or charges an hourly variation. Our pool excavation rock guide explains the equipment, quote clauses and likely cost ranges in more detail.
Protecting the Lawn and Garden
Your lawn is about to have a pretty rough fortnight.
Excavators, bobcats, spoil piles, plumbing trenches and stacks of building materials all need somewhere to go. There is no polite way for a tracked excavator to cross a lawn forty times.
Damage inside the agreed work zone is often unavoidable. Damage outside it can usually be reduced with:
-
Bog mats or track mats
-
Plywood over vulnerable surfaces
-
Marked access routes
-
Protected garden beds
-
Agreed spoil and material-storage locations
-
Before-and-after photographs
-
A written reinstatement agreement
Confirm who will remove fences, protect paving and repair the access path before work starts.
The honest before-and-after picture is covered in our guide to pool installation garden damage.
Preparing the Pool Bedding
Once excavation is complete, attention turns to the part nobody sees but everybody relies on. The bedding.
This is usually crusher dust or a suitable aggregate no larger than 7 mm, installed according to the supplied engineering and AS1839:2021 Fibreglass Pool Installation requirements.
The bedding:
-
Supports the shell evenly
-
Allows accurate levelling
-
Helps manage water beneath the pool
-
Removes the need for a concrete slab under a standard in-ground installation
The surface must be checked carefully with a laser level. A small error in the base can become much more obvious once the shell is full and the waterline gives you a perfectly straight reference.
The bedding material and method should follow the installation requirements supplied with the shell and AS 1839:2021.
What if the Block Slopes?
A fibreglass pool can be installed on a sloping block, but the support, drainage and retaining need to be designed before excavation.
The main configurations are:
-
Cut into the slope
-
Partly raised
-
Fully raised on an engineered support system
A fully raised installation requires a shell designed and approved for that use. A standard in-ground shell should not simply be placed above ground and dressed up with a nice bit of timber.
Slope-related site work may add around $3,000 to $20,000 or more, depending on retaining walls, drainage, structural support, access and engineering.
Our fibreglass pool sloping block guide explains the different installation methods, likely costs and how engineers determine the right solution for your site.

Stage 3: Crane Day and Shell Placement
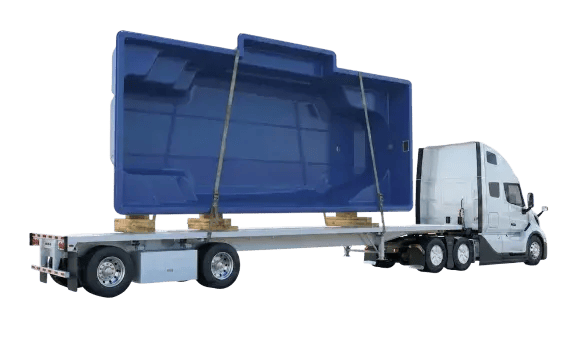
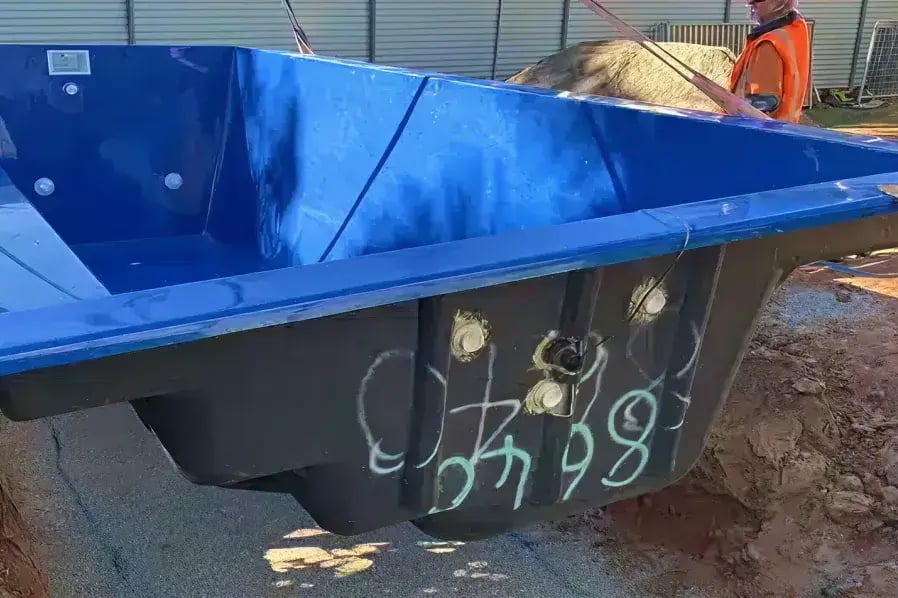
This is the day everyone has been waiting for. The shell finally arrives. The neighbours suddenly find reasons to be out the front. And someone inevitably pulls out a phone to film a swimming pool flying over the roof and lowered into the excavated hole.
Crane day might be the shortest stage of the installation, but it is easily the most impressive. For an experienced crane crew, it's also surprisingly routine.
The shell may only spend several minutes in the air, but the truck positioning, crane setup, safety checks, rigging, placement and pack-down take longer.
The crane company chooses the crane and lift method based on:
-
Shell dimensions and weight
-
Distance from the crane to the excavation
-
Roof height and other obstacles
-
Ground conditions
-
Street and driveway access
-
Overhead powerlines
-
Available setup space
A straightforward lift may use a smaller mobile crane. A long over-house reach, narrow street or difficult setup may require a much larger crane, permits, traffic control or additional planning.
Basic crane hire can sit around $500 to $1,500 for a simple lift. More difficult metropolitan or long-reach jobs can cost several thousand dollars, with highly restricted sites costing substantially more.
The exact figure should come from a site-specific crane assessment rather than a guess made from the back deck.
Before the Crane Arrives
A successful crane day starts well before the truck arrives.
The crew will usually confirm:
-
The excavation and bedding are complete.
-
The shell orientation is correct.
-
The crane has suitable access and setup space.
-
The lift path is clear.
-
Vehicles are moved out of the way.
-
Powerline clearances have been assessed.
-
Any required permits or traffic management have been arranged.
-
The excavation is ready to receive the shell.
The shell should be rigged using the supplied lifting information and the crane crew’s lift plan. The dogger and crane operator control the lift.
Once lowered into place, the shell is checked against the planned level and position before plumbing and backfilling begin.
Our fibreglass pool crane day guide explains exactly how shell delivery works, while the pool installation access requirements guide looks at the site constraints that affect both excavation and crane placement.
Stage 4: Plumbing, Groundwater Provisions and Electrical Work
With the shell sitting in the excavation, it's time to connect everything that makes it an actual swimming pool instead of a very expensive fibreglass bathtub.
The plumbing connects the shell to the filtration equipment and any optional extras you've chosen.
Depending on your pool design, this may include:
-
Skimmer box
-
Return jets (eyeballs)
-
Heating provisions
-
Spa jets
-
Water features
-
Other equipment included in your selected pool kit
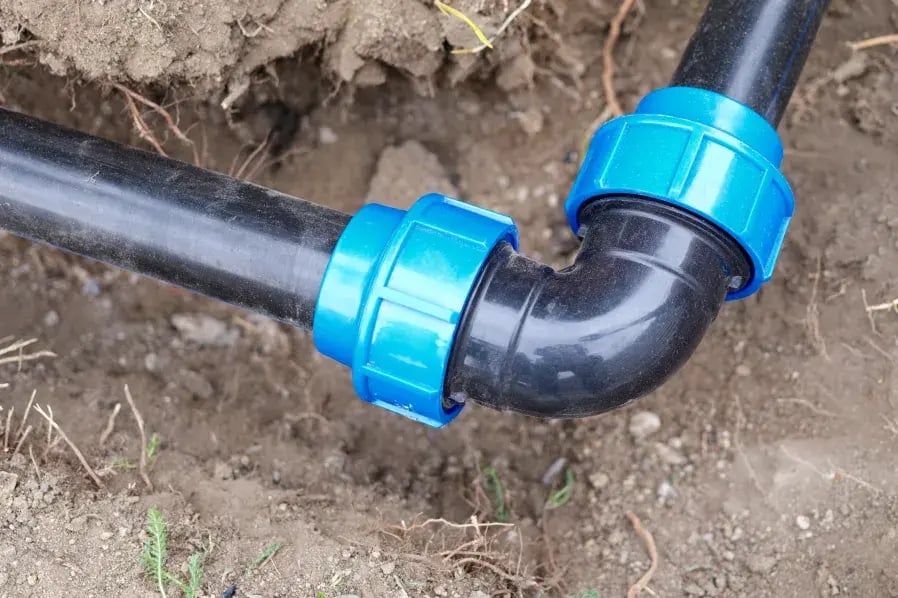
Pool circulation plumbing commonly uses Class 9 PVC and suitable pressure glue. A typical layout may use 50 mm pipe from the skimmer to the pump and 40 mm for other connections.
The exact pipe sizes and layout depend on your pool, equipment and site, which is why Complete Fibreglass Pool Kits recommends equipment based on your individual project rather than supplying the same setup for every backyard. A pool tucked under gum trees in Brisbane won't have the same equipmemt as one sitting in full sun on the WA coast.
We tailor equipment recommendations around factors such as:
-
Pool size and expected use
-
Distance to the equipment pad
-
Heating and water features
-
Surrounding trees and debris
-
Water supply
-
Sewer or septic arrangements
-
Local requirements
Pressure-test the pipework before backfilling. Finding a leaking joint while the pipe is visible is annoying. Finding it after the paving is finished is the sort of character-building exercise nobody requested.
Managing Groundwater
Groundwater management should be planned around the soil, slope, drainage and shell engineering.
A common installation includes a 100 mm standpipe and a hydrostatic relief valve. The standpipe provides an accessible point for checking or pumping groundwater, while the valve helps relieve pressure when the water level outside the shell becomes higher than the water level inside it.
The main protections against a pool lifting are:
-
Installing the pool at the correct finished height
-
Directing surface water away from the pool
-
Providing subsoil drainage where needed
-
Installing the required standpipe and hydrostatic provisions
-
Following the supplied engineering
Backfill helps support the shell, but it isn't the thing preventing flotation. The real protection comes from the whole system working together. Correct pool height, good drainage, suitable groundwater management and following the supplied installation requirements.
Our detailed guide explains can a fibreglass pool pop out of the ground, what causes flotation and how correct drainage and installation reduce the risk.
Electrical and Regulated Plumbing Work
Pool electrical work must be completed by an appropriately licensed electrician.
This may include:
-
Power to the equipment area
-
RCD protection
-
Bonding or earthing
-
Heating equipment if a hardwired installation is required
There is no sensible DIY shortcut here. Water and improvised electrical work that requires a licensed electrician have never been a particularly strong partnership. You don’t need an electrician to install low-voltage LED lights to the pool or set up filtration equipment.
What About DIY Plumbing?
One question we hear regularly is whether owner-builders can complete the plumbing themselves. The answer depends on what plumbing you're talking about.
Pool circulation plumbing can definitely be completed without needing a plumber. However, regulated plumbing work, such as connecting a sand filter waste line into the sewer, will require a licensed plumber. Cartridge filter systems do not require the same sewer connection.
Stage 5: Backfilling, Levelling and Progressive Water Filling
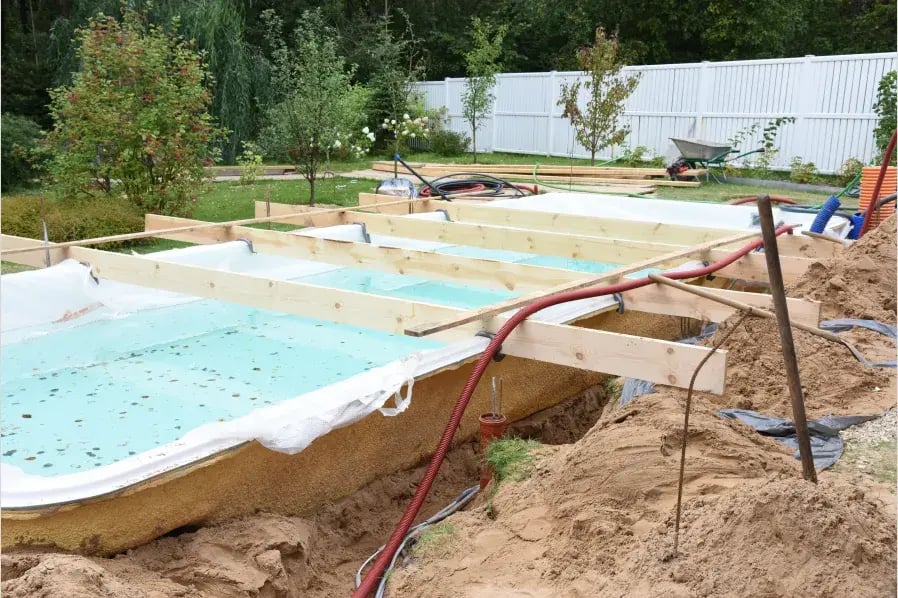
Backfilling means filling the space between the pool shell and the excavated walls.
Backfill material must be cement-stabilised and compliant with AS1839:2021 Fibreglass Pool Installation. This provides firm support around the shell and helps resist erosion or movement of loose backfill material.
Backfill is placed progressively while the pool is filled with water. The level inside and the backfill level outside are brought up together so pressure remains balanced and the pool walls stay straight. Confident owner-builders may handle this stage themselves, but it is physical and attention to detail-heavy.
The installer or owner-builder should keep checking:
-
The pool level
-
The water level
-
The backfill height
-
Wall alignment
-
Support beneath steps and benches
-
Plumbing positions
-
The finished height against the surrounding ground
Do not rush this stage. A shell can be level when it is empty and still move as water and backfill are added.
The finished pool height must also work with the surrounding ground and drainage. Paving and landscaping should fall away from the pool rather than sending rainwater towards the shell.
Temporary Fencing During Construction
The pool begins holding water during backfilling, well before the permanent fence and final certification are complete. Once the pool can holds more than 300 mm of water, a compliant AS1926.1 temporary barrier is required during construction.
Do not treat this as something to organise after the shell is full. Temporary fencing should be planned before backfilling starts so the site can be secured as the water level rises.
Your installer, council or certifier should confirm the exact construction-stage barrier requirements for your project. The permanent pool fence comes later, but the backyard still needs to be safe in the meantime.
A half-filled pool beside an open building site is not the place to rely on a closed side gate and good intentions.
Stage 6: Bond Beam, Coping, Surrounds and Filtration
After the shell has been backfilled, levelled and supported, the concrete bond beam is installed where required as per AS1839:2021 Fibreglass Pool Installation.
The bond beam is a reinforced concrete ring around the top of the pool. It ties into the shell edge and provides a stable foundation for paving or surrounding finishes such as exposed aggregate concrete.
A typical bond beam is around 400 mm wide. It may be widened to suit larger coping tiles or site-specific engineering.
Coping installation can commonly begin after around seven days, subject to the concrete specification, curing conditions, weather and the concreter’s advice.
Coping and Pool Surrounds
Coping is the finished edge installed around the pool. Common Australian options include:
-
Travertine
-
Concrete or bullnose pavers
-
Porcelain coping
-
Poured concrete
-
Other compatible edge systems
Indicative installed prices vary by product, preparation, access and location. As a broad guide:
-
Travertine may cost around $90 to $150 per linear metre
-
Bullnose pavers may cost around $55 to $95 per linear metre
-
Simpler edge systems may cost less
Beyond the coping, the pool surround might be a modest concrete apron or a complete outdoor area with paving, decking, landscaping and a cabana.
This is where budgets often grow legs.
The pool kit may stay exactly on budget while the outdoor kitchen, frameless glass, feature wall and “just a few extra square metres” of paving quietly organise their own spending spree.
Our Complete Fibreglass Pool Cost Guide explains the broader project costs and where common budget blow-outs occur.
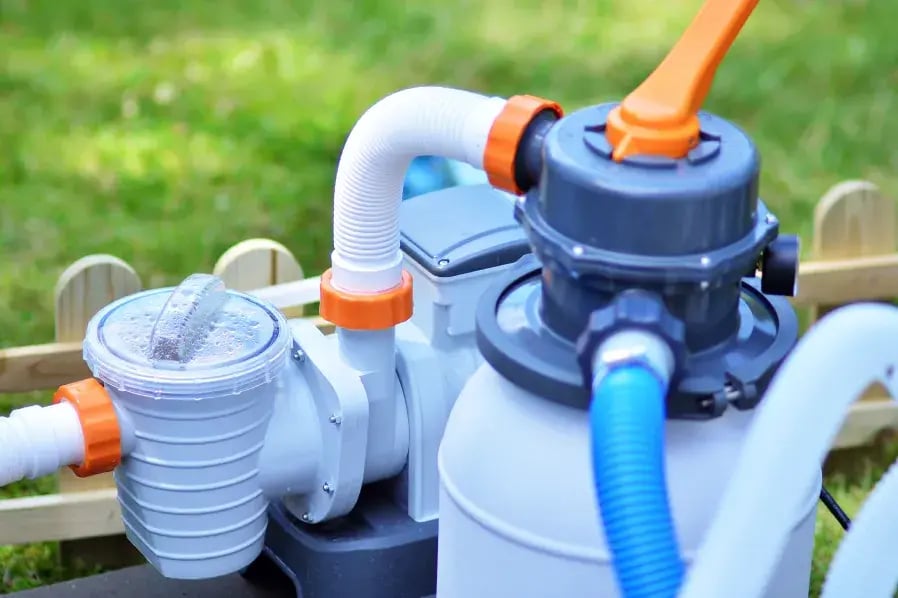
Installing and Testing the Equipment
While the coping and surrounding works are progressing, the pool equipment can be installed and commissioned.
Depending on your selected pool kit, this may include:
-
Pump
-
Filter
-
Salt chlorinator or sanitation system
-
Heater
-
Lighting transformer
-
Water-feature equipment
-
Automation controls
This is also where the project finally starts making satisfying noises instead of construction noises. The pump starts. Water begins circulating.
And for the first time, it actually feels like you've got a swimming pool instead of a building site.
Stage 7: Permanent Fencing, Commissioning and Final Certification
The final construction stage brings together permanent safety fencing, water balancing, equipment commissioning and certification.
When Can You Start Using the Pool?
You can generally begin using the pool once:
-
The water is clean
-
The water has been properly sanitised
-
The water chemistry is safe for swimming
-
The filtration equipment is operating correctly
-
A AS1926.1 compliant temporary pool barrier remains securely in place
The temporary fencing must stay compliant and continue protecting the pool area throughout construction. It is not simply a few loose panels leaning against each other because the permanent fence is coming “soon”.
The barrier still needs to prevent unsupervised access while the paving, landscaping and surrounding work continue.
Water Balancing and Commissioning
Fresh tap water is not automatically swimming-pool water. Before anyone gets in, the water needs to be filtered, sanitised and balanced to suit the shell and equipment.
That usually includes checking:
-
pH - 7.4–7.6
-
Total alkalinity - 80–120 ppm
-
Sanitiser levels
-
Calcium hardness - 200–400 ppm
-
Stabiliser where required
Getting the chemistry right from the beginning helps protect the gelcoat, supports the filtration system and makes the water more comfortable to swim in. It also avoids the classic test where someone looks at the water and says, “Seems clear enough.”
Follow the supplied start-up instructions rather than tipping in a boot-load of chemicals and hoping they sort themselves out.
Permanent Pool Fencing
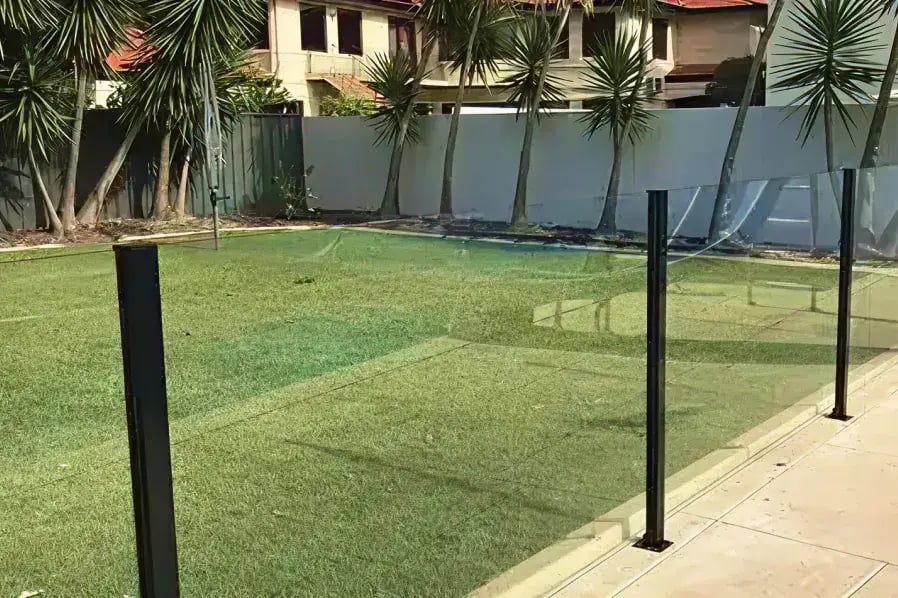
Under AS 1926.1, every pool capable of holding 300mm of water or more must be enclosed by a compliant barrier, and every state requires that barrier to be inspected and certified after the pool is installed.
One of the most common problems is not the fence itself. It is what is beside it. Kids have an impressive ability to turn almost anything into a ladder when sufficiently motivated.
The general requirements are:
-
Barrier height — 1.2m minimum, measured from the finished ground level on the outside of the barrier
-
Non-climbable zones — 900mm clear on the outside of the barrier, 300mm clear on the inside (measured from the top), with no climbable objects (pot plants, BBQs, outdoor furniture) within those zones
-
Self-closing, self-latching gates with the latch at the correct height
-
Compliant signage, with a CPR sign visible from inside the enclosure
Do not design the fence by copying the one next door. Changes in ground level, retaining walls, furniture, planter boxes and even the location of a barbecue can affect compliance.
Your fencing contractor and certifier should confirm the details for your site.
Final Inspection and Certification
Once the permanent barrier and required safety work are complete, the council or accredited private certifier carries out the final inspection.
They may identify issues such as:
-
A gate that does not close or latch correctly
-
Incorrect gaps
-
Finished levels that reduce the effective fence height
-
Climbable objects near the barrier
-
Incomplete signage
-
Changes from the approved plans
Most correction items are straightforward once the certifier explains what needs to change.
Landscaping does not always need to be finished before certification, but the barrier area and relevant ground levels must be ready for inspection.
Final certification completes the finished project. By then, the temporary panels are gone, the paving is complete and the backyard finally looks like the version everyone imagined before the excavator arrived.
Wet Weather and the Australian Installation Calendar
One of the most common questions we hear is:
"What happens if it rains during my pool installation?"
Rain is the install variable nobody quotes for. Light rain is fine. Heavy rain is the enemy of an open hole. It can collapse walls, turn the pad into mud, delay concrete pours and force the crane to stand down for safety. A good installer keeps an eye on the BOM weather forecast and pulls excavation forward or delays crane day to dodge it. Our pool installation wet weather guide covers what stops, what continues, and what realistic weather buffers look like in each Australian state.
Should You Avoid Installing a Pool in Winter?
Fibreglass pools are installed all year round across Australia. In many parts of the country, winter can actually be a good time to build because trade availability is often better than during the spring rush.
The important consideration isn't the season. It's allowing a sensible buffer for weather, particularly if your project includes excavation, crane work, concrete and paving over several weeks.
As a planning guide, allowing an extra five to ten days for weather delays is usually sensible. Some projects won't need it. Others will use every one of them.
North Queensland's wet season (December–April) is the most disruptive; southern winter rain is more spread out but rarely halts a job for weeks at a time. If you're locking in an install date, building a weather buffer into the program is the cheapest insurance you'll buy on the whole project.
DIY or Hiring an Installer: Where Each Stage Splits
Complete Fibreglass Pool Kits supplies the shell, selected equipment, engineering information and DIY guidance.
CFPK supplies the fibreglass pool kit and the documentation that comes with it. From there, you choose how much of the install you want to handle yourself, and how much you want a licensed installer to handle for you. Many CFPK customers go full DIY and save $10,000–$25,000 compared with a full-service builder quote on a similar pool. Others order the kit but bring in a licensed installer for some or all of the on-site work, which is a hybrid approach that still saves money and keeps you in control without taking on every job yourself.
Either approach can work well. The installation stages stay much the same. Who completes each stage is what changes.
|
Stage |
DIY-friendly? |
Notes |
|
Council approval |
Yes |
Most councils accept owner-builder applications. An installer can also lodge on your behalf. |
|
Excavation |
Hire and supervise |
A licensed excavator operator on a day rate is standard for both paths. |
|
Crane delivery |
Hire only |
Almost always a licensed dogger and crane operator |
|
Plumbing |
Yes (with care) |
PVC plumbing is suitable for confident DIYers. Installers complete this as standard. |
|
Mains Electrical |
No — licensed only |
Any new circuits, power points or switchboard work must be completed by a licensed electrician. |
|
Bond beam concrete |
Yes |
A small concrete pour is achievable for a confident DIYer using the right equipment and guidance. |
|
Backfill |
Yes |
The most physical job on the program. Can be completed without prior experience with the correct guidance and supporting videos, |
|
Coping and decking |
Yes |
Many owner-builders successfully complete their own paving and decking. |
|
Water fill |
Yes |
Use your garden hose for a slow and controlled water fill |
|
Fence installation |
Yes |
Many aluminium and glass pool fencing systems are designed for owner installation where permitted. |
|
Fence certification |
No — certifier only |
Always done by an accredited inspector. |
Realistic Fibreglass Pool Installation Timeline
The active installation can move quickly. The full project usually does not.
A sensible planning timeline looks like this:
|
Project period |
Activity |
Main pressure |
|
8 to 12+ weeks before construction |
Choose pool, review site, obtain quotes |
Access, layout and early decisions |
|
2 to 12+ weeks before construction |
Approval and site documents |
Council or certifier timeframe |
|
Final week before excavation |
Final set-out, BYDA review, trade confirmation |
Accuracy and coordination |
|
Construction Week 1 |
Excavation and bedding |
Weather, access, rock and soil removal |
|
Construction Week 1 |
Shell delivery and placement |
Crane access and site readiness |
|
Construction Week 1–2 |
Plumbing and pressure testing |
Trade coordination |
|
Construction Week 1–2 |
Backfill and progressive water filling |
Levelling and temporary fencing |
|
Construction Week 2 |
Bond beam where required |
Concrete and curing conditions |
|
Construction Week 2–3 |
Coping, equipment and surrounds |
Materials and finishing trades |
|
Construction Week 3–4 |
Permanent fencing and commissioning |
Fence readiness |
|
Construction Week 4 |
Final inspection and certification |
Pass or correction items |
A straightforward installation may take around four weeks from excavation to completion.
A realistic quote-to-completion allowance is typically 8 to 12 weeks, although fast-track approval and a straightforward site can be quicker. Difficult access, retaining walls, rock excavation, wet weather, council approval timeframes or trade availability can all extend the schedule.
The full breakdown of how long fibreglass pool installation really takes explains which stages usually cause delays and how season and location affect the program.
Planning a Christmas swim? Start well before spring if possible.
Once October arrives, installers, excavators, concreters, crane crews and fencing contractors tend to become busier. Starting early gives you more choices and a better chance of solving surprises without the whole family asking whether the pool will be ready by Boxing Day.

What to Remember Before Your Fibreglass Pool Installation
A fibreglass pool shell can be installed surprisingly quickly, but achieving a great result depends on everything that happens before, during and after delivery.
Take the time to choose the right pool size for your site, organise approvals and underground service checks, and schedule excavation, delivery and installation as close together as practical. Follow the supplied engineering information for bedding, plumbing, groundwater management, backfilling and the bond beam, and don't be afraid to ask questions if you're unsure along the way.
Most importantly, know who is responsible for each stage.
Whether you choose a full DIY installation or a hybrid approach with licensed trades, the best projects are the ones where everyone understands their role before the excavator arrives.
Do that, and the installation becomes a series of manageable steps rather than one very large hole followed by several urgent phone calls.
Frequently Asked Questions about Fibreglass Pool Installation
Can I install a fibreglass pool in stages to spread out the cost? Yes. Many owner-builders complete their fibreglass pool project in stages. The pool shell, plumbing and equipment are installed first so the pool can be filled, balanced and used while the paving, landscaping and other cosmetic improvements are completed later. The exact sequence depends on your site and local compliance requirements.
What happens if my pool shell arrives before the excavation is ready? Ideally, the pool shell should arrive shortly before crane day. Delays between excavation and installation increase the risk of rain entering the excavation, unstable ground conditions and additional costs. If your schedule changes unexpectedly, you can store a fibreglass shell onsite for many months without any issue.
Do I need all of my landscaping finished before the pool is certified? No. Landscaping can often be completed after certification, provided it doesn't affect pool barrier compliance. The permanent fence and other required safety measures must meet your local requirements before final certification, but gardens, planting and other cosmetic works can usually be finished afterwards.
What is the biggest mistake homeowners make during pool installation? One of the most common mistakes is underestimating site preparation. Access restrictions, rock excavation, drainage, retaining walls and approval timeframes often have a bigger impact on the project than the pool shell itself. Spending more time planning before excavation usually saves both time and money later.
Should I organise all of my trades before excavation starts? Yes. Whether you're completing a DIY or hybrid installation, it's much easier when excavation, crane delivery, plumbing, backfilling and concrete work are scheduled close together. Good coordination reduces delays, limits the time an excavation is left open and helps keep the project on schedule.


