


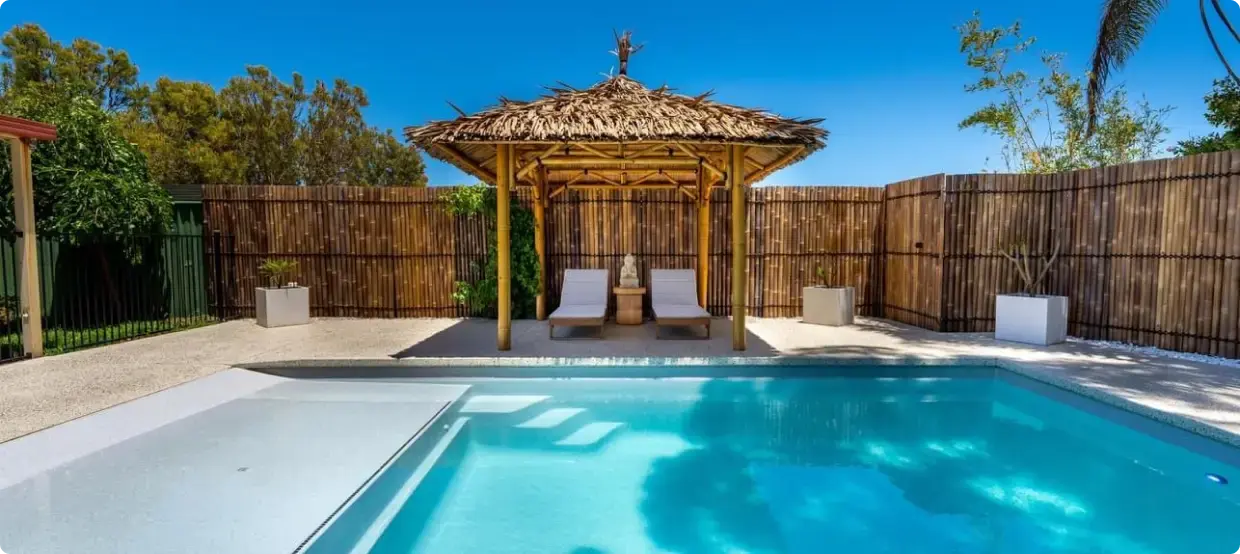
THE ESSENTIALS YOU MUST KNOW BEFORE BUYING A POOL


Do It Yourself Fibreglass Pools:
The Ultimate DIY Project!

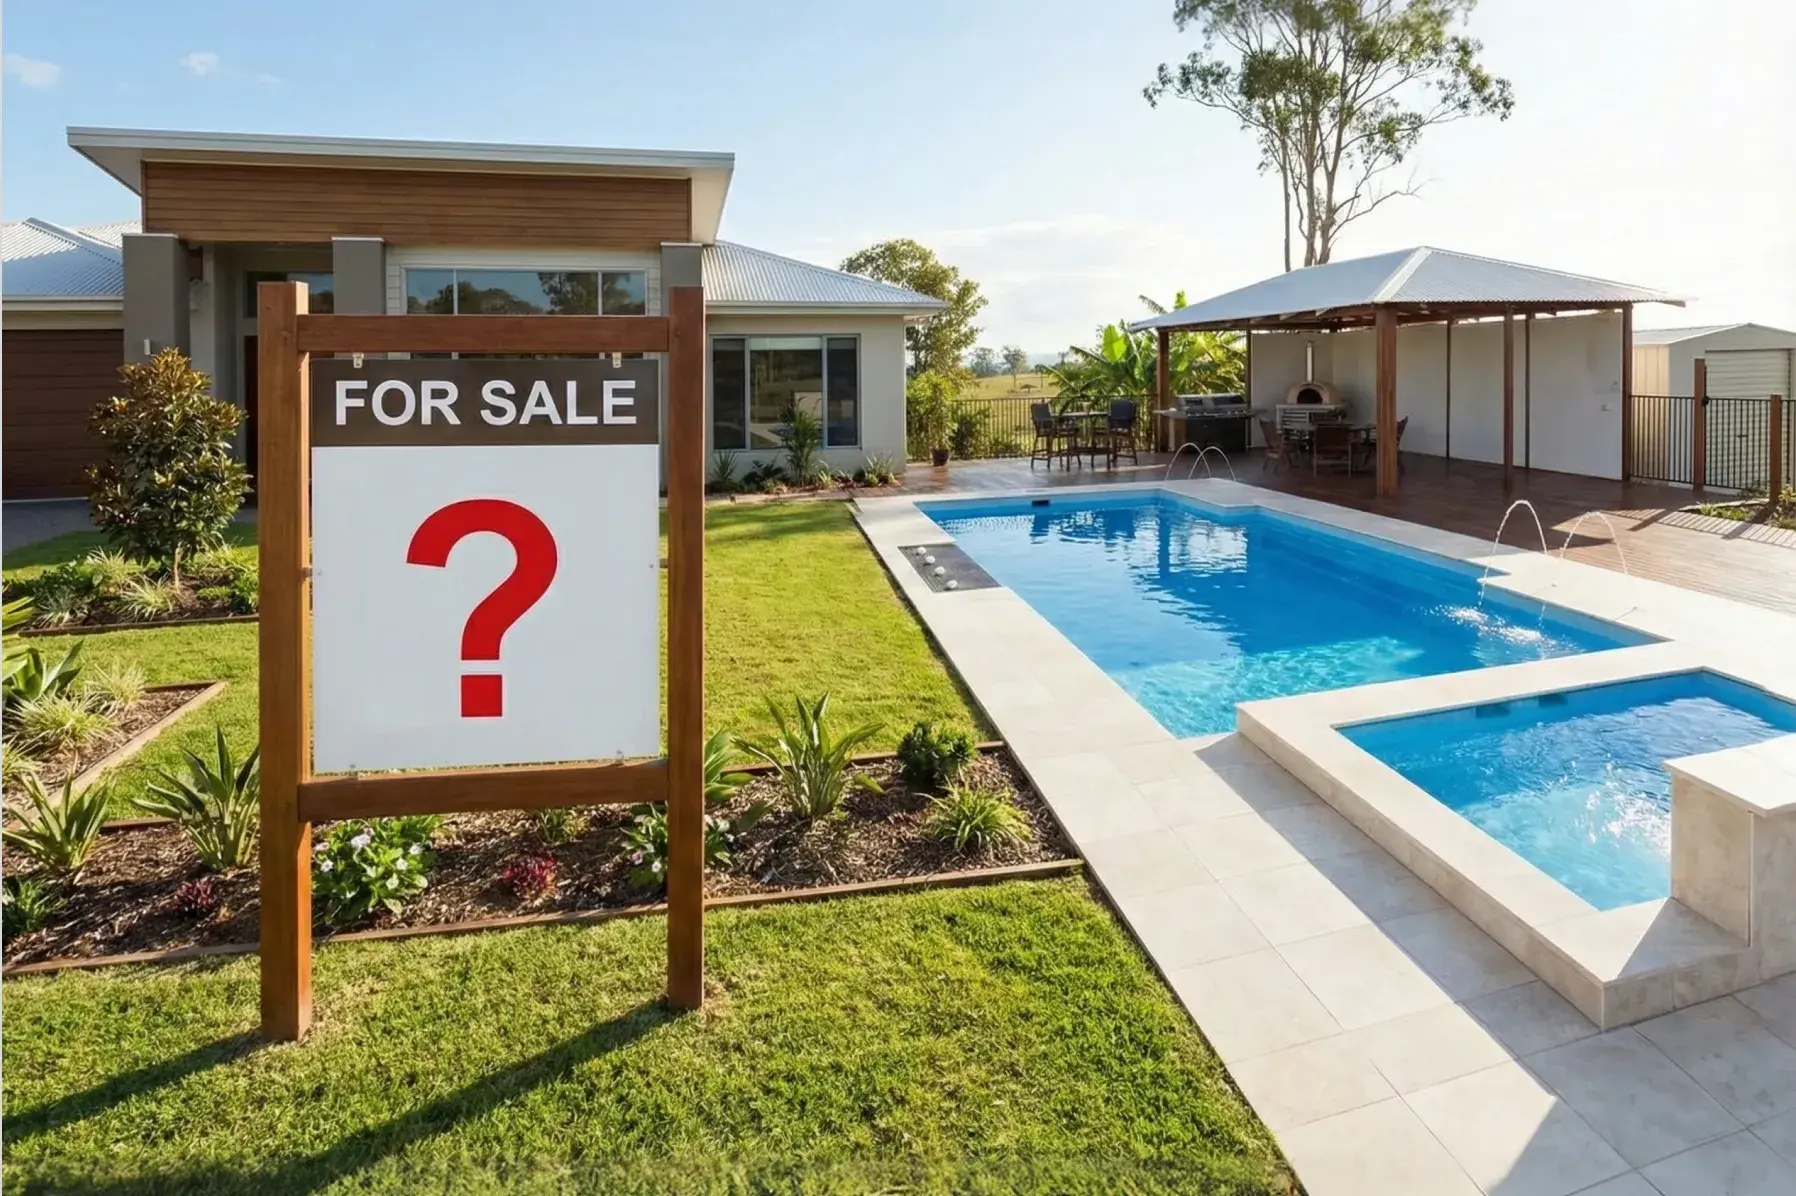
Don’t Buy a Pool Until You Read This Guide First!
DIY vs. Fully Installed
Thinking about putting in a pool? Bloody good choice! But before you start picturing backyard barbies and summer arvo’s in the water, you’ve got a big decision to make—should you go DIY with a fibreglass pool kit, or let a full service, full price pool builder install the pool for you?
Both options have their ups and downs, and it all comes down to your budget, how handy you are, and how much effort you want to put in. Keen to save some coin and get stuck into the project yourself? Or would you rather sit back, relax, and pay for others look after installation from go to woe?
What is a DIY Fibreglass Pool?
A DIY fibreglass pool is a pre-manufactured pool shell and filtration equipment that is delivered to your home as a complete kit, allowing you to install it:
- Yourself with the help of a few hired professionals such as excavators and electricians
- Yourself with the help of an independent pool installer who looks after the physical installation stages
- Using an independent licensed pool installer who manages the entire project for you
These DIY fibreglass pools are cost-effective, relatively easy to install with the right information and support, and saves you thousands of dollars. With some planning and effort, you can successfully install a fibreglass pool and enjoy the rewards of your hard work. See for yourself how possible it is to build your own DIY plunge pool on a budget.
What is a Full Service, Full Price Pool Builder installed pool?
A fully installed pool is purchased through a full service, full price pool company that manages the entire process—from excavation and installation to plumbing, filtration, and finishing touches. This option is ideal for those who want a hassle-free experience but comes at a much higher price tag.
The Best Choice for Your Backyard:
- If you love DIY projects, want to save money, a DIY fibreglass pool kit is the way to go.
- If you want a pool without being hands on and have plenty of budget, a pool installed by a full service, full price pool builder is a better fit.
The choice comes down to your budget, time, and how involved you want to be in the installation process.
Ready to take the plunge? If DIY is for you, check out our step-by-step installation guide to help you get started!

Rohan Taylor
Author
.webp)

Dave and Rachel Green
Brisbane
Cost Saving
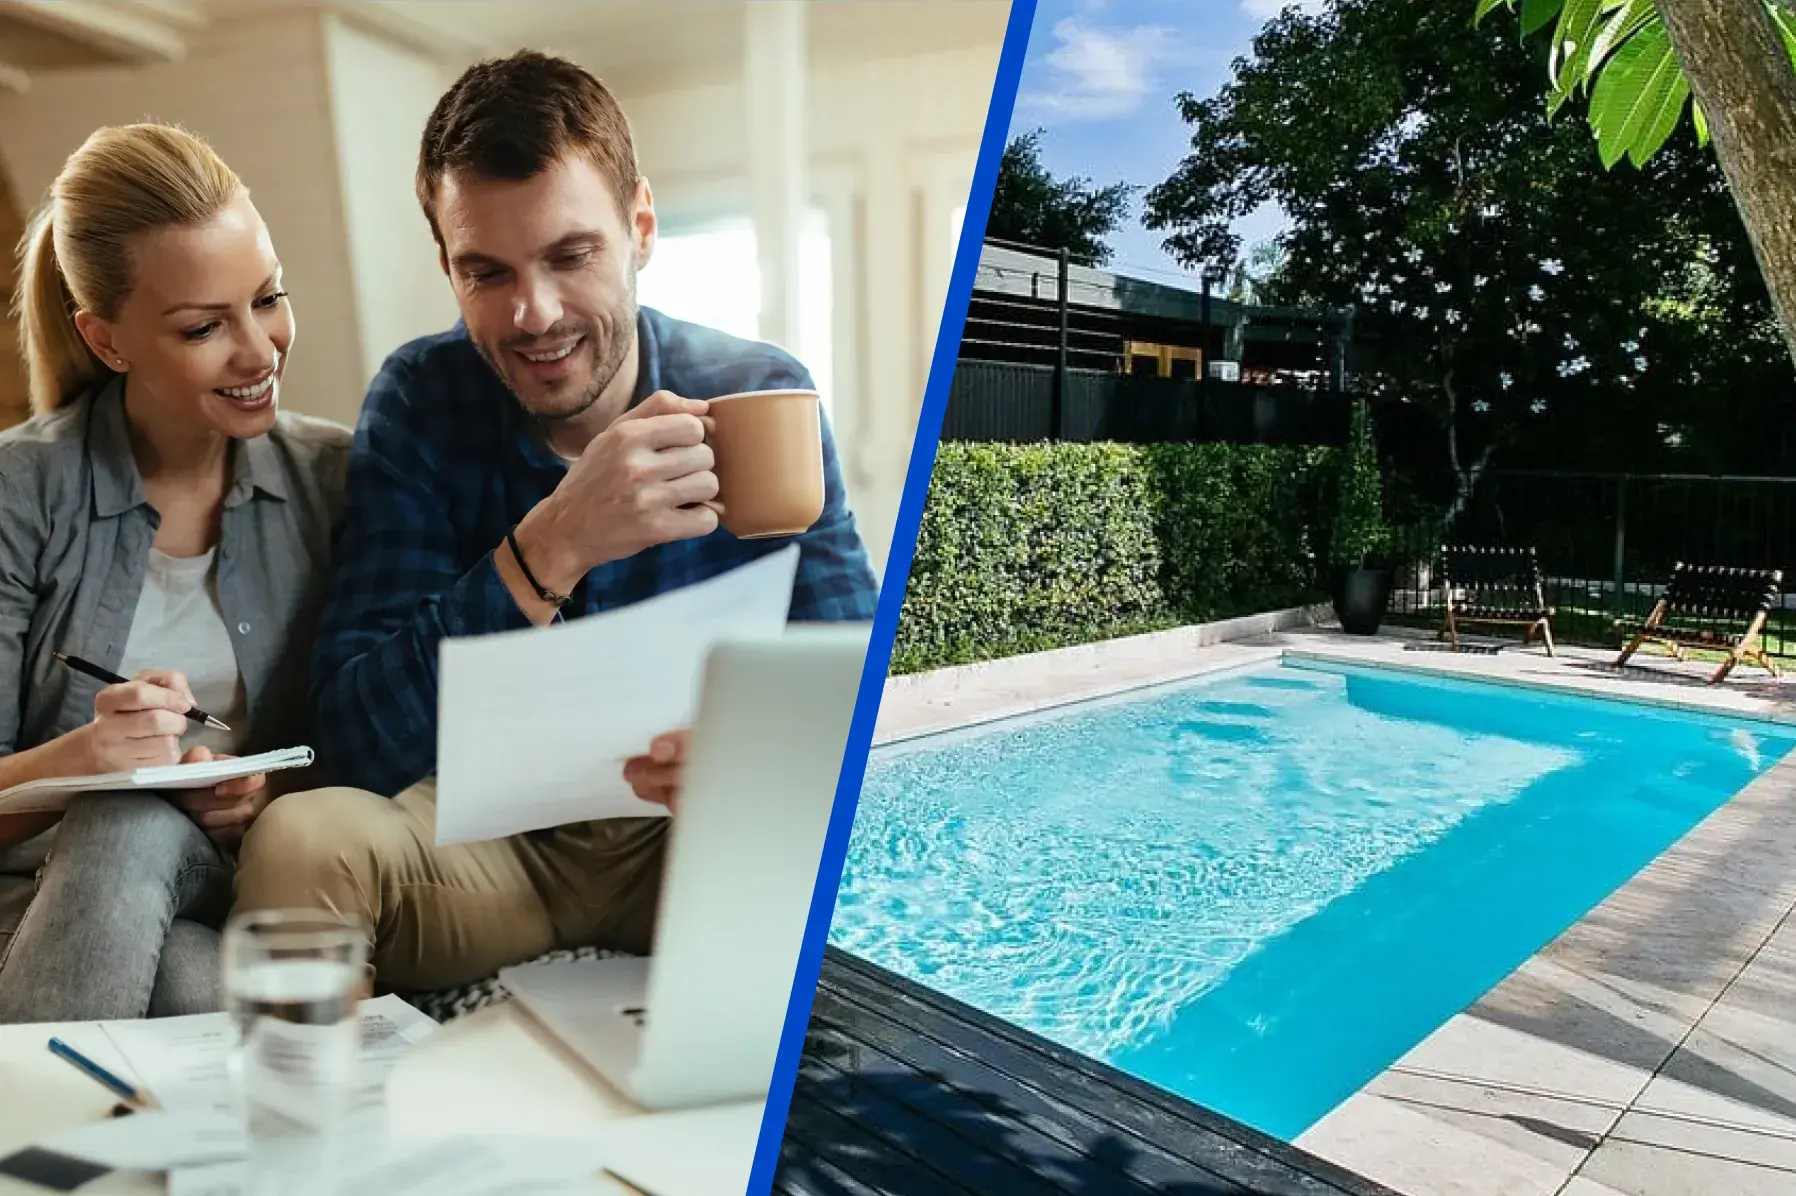
One of the biggest reasons homeowners choose DIY fibreglass pools over the full service, full price pool builder option is the significant cost savings. A pool is a major investment, and cutting out unnecessary expenses will save you thousands—without sacrificing quality.
Let’s break down exactly how much you can realistically save by going the DIY pool route and where those savings come from. There are many different factors associated with these cost savings:
Eliminating High Labour Costs
Full service, full price pool builder installation comes with hefty labour charges and profit margins —ranging from $20,000 to $40,000, depending on complexity and the pool size. With DIY installation, you cut out these costs completely by handling the excavation, plumbing, and pool placement yourself. Many DIYers hire trades only for specialised tasks, such as electrical connections and excavation works.
Flexible Site Preparation & Excavation
Full service, full price pool builder’s markup excavation and site prep costs—what should be a $2,000–$5,000 job can easily turn into $5,000–$10,000. By hiring your own excavation contractor (or renting equipment if you’re experienced), you cut these costs significantly. You also control when and how excavation is done, avoiding added costs due to project delays.
Avoiding Unnecessary Extras
Full service, full price pool builder’s bundle in high-margin extras, such as - expensive paving & tiling packages, premium water features and overpriced heating and automation. With a DIY pool, you decide what’s essential and can phase in upgrades over time, rather than paying for everything upfront. Larger DIY pool companies have low overheads and volume buying power and can supply equipment and add ons at competitive prices.
Eliminating High Profit Margins
Full service, full price pool builders often have display centres, a team of sales people and administration offices. Meeting these expenses comes from their customers paying high profit margins. Dedicated DIY pool companies can operate without these fixed overheads. This results in being able to supply quality fibreglass pool shells and equipment to customers across Australia at much lower prices.
Is a DIY Pool Worth It?
Short answer: YES!
By choosing a DIY fibreglass pool, homeowners can save anywhere from $5,000 – $30,000+, making a high-quality pool more affordable and achievable. Read more about the cost, construction and more of a DIY pool. DIY pools are not just about saving money—they also give you a sense of achievement and control over your pool project.
Check out more cost-saving tips and strategies in our blog How Much Does it Cost To Install A Pool?
Craig Smith
Western Australia
Assessing your backyard space and limitations
Before you start digging up the backyard, take a step back and make sure you’ve got all your ducks in a row. Proper planning is the key to a smooth, stress-free (and budget-friendly) pool installation.
From checking your site conditions to making sure there’s enough room to get the pool shell in, a little prep work now can save you a heap of headaches later. You don’t want to be halfway through the job only to realise the digger can’t fit down the side of the house or you’ve hit solid rock under the soil!
Get it right from the get-go, and you’ll be splashing around in your new pool sooner—without blowing the budget or dealing with unnecessary delays. Let’s dive into the essentials and make sure your backyard is pool-ready.
Understanding How Much Space You Need
No two backyards are the same, and while fibreglass pools come in a range of sizes, choosing the right one isn’t just about what fits—it’s about how it functions within your space. A pool should enhance your backyard, not dominate it. It’s tempting to go big, but a well-designed outdoor space will always be more enjoyable than a giant pool that leaves no room for entertaining, lounging, or simply moving around comfortably.
Key Measurements to Consider:
- Pool Shell Dimensions – Fibreglass pools typically range from 4m to 11m in length and 2.5m to 4m in width
- Surrounding Area – Allow for at least 1m of clearance for paving, decking, and landscaping
- Equipment Space – A pool filter, pump, and chlorinator require at least 2m x 1m of space, with access to power and water connections
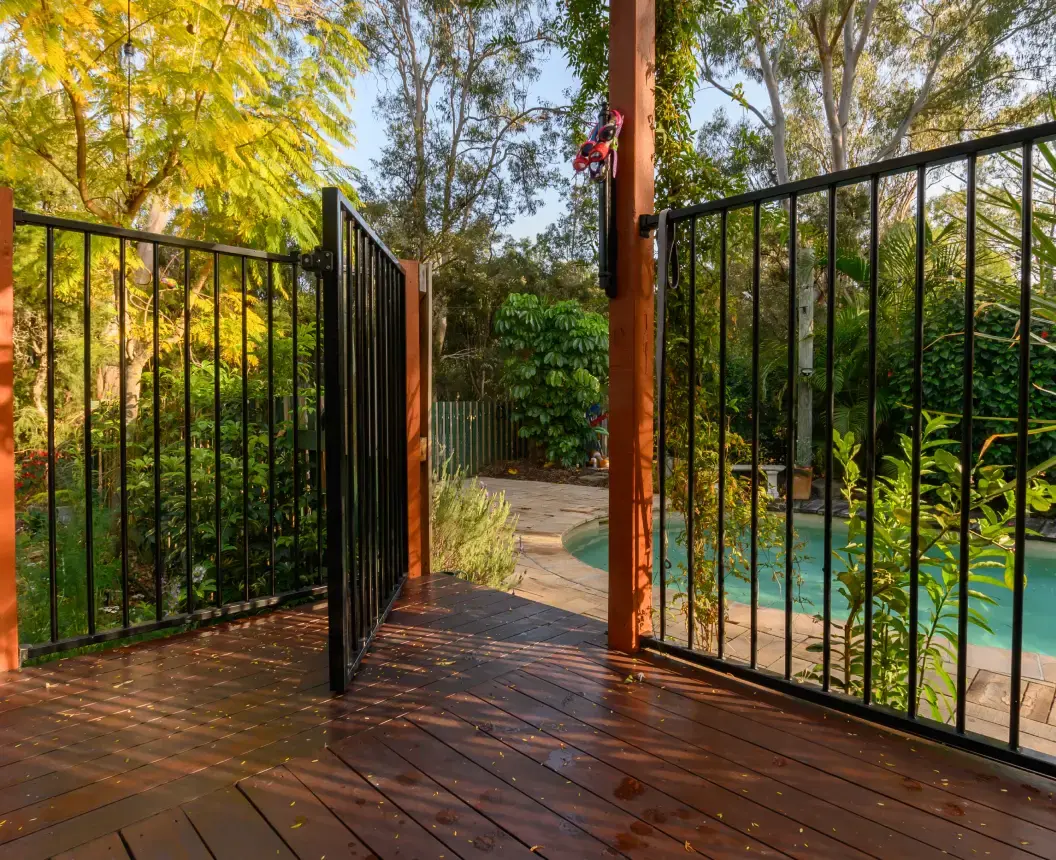
- Pool Fencing Compliance – Australian pool laws mandate safety fencing for all pools deeper than 300mm. This will affect how much additional space you need.
Pro Tip: Use marking paint, a garden hose, or builders string to outline your potential pool in your backyard. This gives you a realistic visual of how much space your pool will take up.
Evaluating Your Backyard’s Terrain & Site Conditions
The shape and condition of your yard plays a big role in determining how complex (or simple) your pool installation will be. It is important to ask yourself these questions:
Is Your Yard Flat or Sloped?
- Flat terrain is the ideal scenario
- Sloping terrain may need retaining walls and additional excavation which increases costs.
What Type of Soil Do You Have?
The type of soil in your backyard affects excavation and stability:
- Sandy Soil – Easy to dig and drains well
- Clay Soil – Expands/contracts with moisture, which may require extra backfilling or drainage
- Rocky Soil – Harder to excavate, increasing costs and requiring specialised machinery.
Do You Have Enough Access for Pool Installation?
Since fibreglass pools arrive as a single shell, you need to ensure sufficient access for delivery, excavation, and installation. In our blog piece ‘Three Questions Most Buyers Have About DIY Fibreglass Pools’ we go into more detail on access, sloping sites and also the use of cranes when installing DIY pools. This will give you a better understanding of the access you require for proper pool installation.
Council Approvals & Local Regulations
Every state and local council in Australia has specific requirements for pool installations. You must check these with your local council before excavation begins.
Key Regulations to Consider:
- Building Permits – All councils require permits before installation which can take up to 6 to 12 weeks to obtain
- Boundary Setbacks – Pools typically need to be at least 1m from property boundaries, but this varies depending on your local council requirements
- Easements & Utility Lines – Pools have to be installed with a minimum distance from easements or major underground utilities (e.g., gas, sewer, electrical lines)
- Pool Fencing – Must comply with Australian Standards (AS1926.1), ensuring self-closing gates and compliant heights.
You can also check out the ‘Getting Started: Planning Your New DIY Fibreglass Pool’ blog for more information on council approvals and local regulations.
Pool Positioning & Sun Exposure
Choosing where to place your pool will impact ease of access, maintenance, and heating costs.
Ideal Placement Considerations include:
- Sunlight Exposure – Position your pool to maximise sun exposure, reducing the need for artificial heating
- Avoid Large Trees – Overhanging trees can drop leaves and debris into the water, increasing maintenance
- Wind Protection – High winds cool pool water faster and increase evaporation—position your pool in a protected area or consider a windbreak (fencing or hedging).
For a detailed guide on assessing your backyard space and limitations before installing your DIY fibreglass pool, check out our Backyard Assessment & Planning Guide here: Getting Started – Planning Your DIY Pool.
Determining the pool size and shape that suits your needs
Choosing the right size and shape for your DIY pool is one of the most important decisions in the installation process. The perfect pool balances available space, functionality, budget, and aesthetics while ensuring it meets your family’s needs.
How to Choose the Right Pool Size for Your DIY Installation
Before you decide, take a step back and picture how your pool will be used. Will it be a place for the kids to splash around? A spot for morning laps? Or the centrepiece of your backyard where friends and family gather?
Who will be using the pool?
- For young families - a pool with a shallow entry or a compact, family-friendly design is a great choice. It offers plenty of space for fun while keeping the water depth safe for little ones
- If fitness is your focus - a lap pool or long, rectangular design will give you the space you need for uninterrupted swimming
- Entertaining - A larger pool with built-in seating or room for water features creates the perfect atmosphere for socialising.
How much space do you have?
- A large backyard - If your yard is 10 metres wide or more, you have the flexibility to go for a family-sized or resort-style pool with room for decking and landscaping
- A small yard - If your space is tighter—around 5 metres wide or less—a plunge pool or compact lap pool can provide all the benefits of a pool without overwhelming your backyard.
What’s your budget?
- Larger DIY pools cost more in excavation, installation, fencing, and maintenance
- Smaller DIY pools require less water, fewer chemicals, and lower running costs.
Are there space limitations?
- Ensure clearance for pool fencing, and equipment storage
- Consider council setback regulations (usually 1m from boundaries).
Why Bigger Isn’t Always Better for DIY Pools
Many first-time pool buyers assume that a larger pool is better—but size impacts more than just swimming space.
Hidden Costs of a Bigger DIY Pool:
- Higher upfront costs (larger shell, more excavation)
- More water & chemicals needed
- Increased heating & filtration costs
- More time spent on maintenance
Pro Tip: Choose a pool size that matches your lifestyle, not just your available space. A well-placed 6m pool can be more enjoyable than an underused 10m pool.
‘Key Considerations When Choosing a DIY Plunge Pool Kit’ is a great resource to check out when choosing the right size pool for your DIY project.
Considering any obstacles or restrictions (e.g., trees, utility lines)
Before installing your DIY pool, it's important to identify potential obstacles that could impact placement and installation. Overlooking restrictions like trees, utility lines, or council regulations can lead to unexpected costs and delays.
Common Obstacles That Affect DIY Pool Installation:
- Trees & Landscaping – Large trees may need to be removed due to root interference and excessive debris falling into the pool
- Underground Utility Lines – Always check for sewer, water, gas, and electrical lines before digging. Use Before You Dig Australia to locate services
- Sloping or Uneven Ground – May require excavation, retaining walls, or extra backfilling
- Limited Access for Equipment – Ensure there is space for excavation machinery and pool delivery, or plan for crane hire if necessary
How to Overcome Space Restrictions:
If your backyard has limited space or tricky terrain, there are still plenty of ways to make a pool work. Compact designs like plunge pools or lap pools are perfect for smaller yards, giving you all the benefits of a pool without overwhelming the space. If your site is sloped or difficult to excavate, consider a partial above-ground installation to reduce earthworks and costs. Tight access? No problem—many homeowners use a crane to lift the pool into place, making installation possible even in hard-to-reach areas. And don’t forget about pool fencing and compliance—Australian safety regulations require adequate clearance, so be sure to plan ahead to ensure everything fits seamlessly.
Planning Ahead to Avoid Delays:
-
Conduct a site assessment early to identify obstacles
-
Get professional advice for difficult installations, such as retaining walls or drainage solutions
-
Check local council requirements before purchasing your DIY pool to avoid approval issues.
For more details on assessing backyard obstacles and ensuring a smooth DIY pool installation, check out our in-depth guide resource ‘DIY Fibreglass Pool Installation Process from Start To Finish’ where you can get more information on these key topics.
Lendle Tyrrell
New South Wales
Safety Measures and Local Regulations
Before installing your DIY pool, it’s essential to understand the safety requirements and legal regulations in your area. Failing to comply with these rules can result in fines, delays, or the need for costly modifications.
Key Safety Regulations for all Pools
- Pool Fencing – All pools deeper than 300mm must have a compliant fence with self-closing gates (AS1926.1)
- Boundary Setbacks – Most councils require pools to be a minimum 1m from property boundaries, but this varies by location
- Temporary Fencing During Installation – Required to prevent unauthorised access before permanent fencing is installed
- Electrical Safety – Pools must be correctly earthed by a licensed electrician
- Signage & CPR Charts – All states require a CPR sign to be displayed near the pool area.
How to Ensure Compliance for Your DIY Pool
- Check local council regulations before starting excavation
- Obtain necessary permits for pool installation and fencing
- Use licensed tradespeople for electrical and plumbing work where discharge lines to sewer are required.
Resources for Local Safety Guidelines
For a step-by-step guide on planning your DIY pool with safety in mind, don’t forget to check out our in-depth resource: ‘Planning Your New DIY Fibreglass Pool’.
Council Approval
Before starting your DIY pool installation, you must obtain council approval to ensure compliance with local regulations. Skipping this step can result in fines, stop-work notices, or forced modifications, adding unnecessary costs and delays to your project.
Why Council Approval is Required for DIY Pools
- Safety Compliance – Ensures fencing, depth, and installation meet Australian Standards
- Property & Boundary Regulations – Prevents issues with setbacks, easements, and underground utilities
- Environmental Impact – Confirms proper drainage and water management to avoid flooding or erosion.
Avoiding Delays in the Approval Process
- Ensure your site plan is accurate, including boundary setbacks and access points
- Work with a private certifier if you want a faster approval process.

Zach Goodwin
New South Wales
Core Components for DIY Pool Installation
A successful DIY pool installation starts with having the right equipment and kit inclusions before you begin. Proper preparation ensures a smoother installation, avoids costly mistakes, and prevents delays. Below is a complete list of essential components you’ll need for your DIY fibreglass pool project.
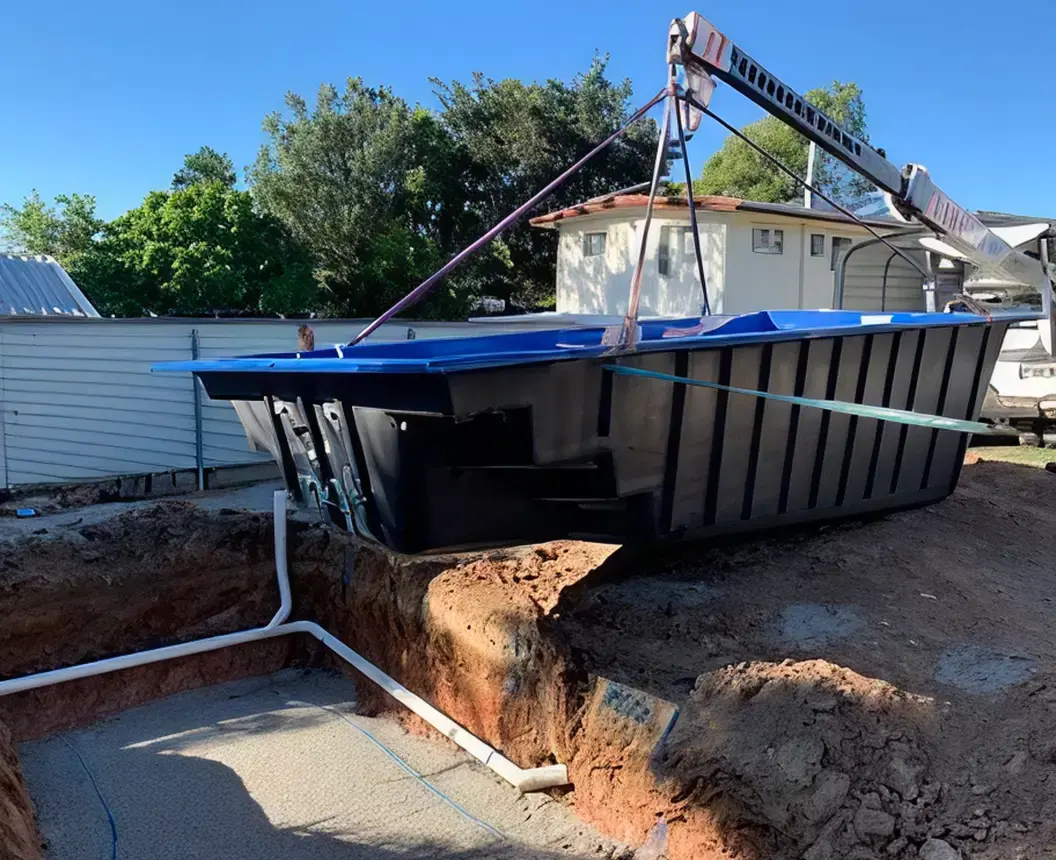
Fibreglass Pool Shell:
Make sure your pool shell meets Australian Standards (AS1838:2021) for structural integrity and has a 35-year lifetime structural warranty.
Filtration System:
Keeps the water clean, consisting of a pool pump for circulation, a filter (sand or cartridge) to remove debris, and automated sanitisation, whether it’s a saltwater, mineral, or freshwater system.
Plumbing & Circulation Supplies:
Including a skimmer box and return jets connected to the filtration system, Class 9 PVC piping for underground installation, and a hydrostatic valve to prevent ground water pressure from moving the shell after installation.
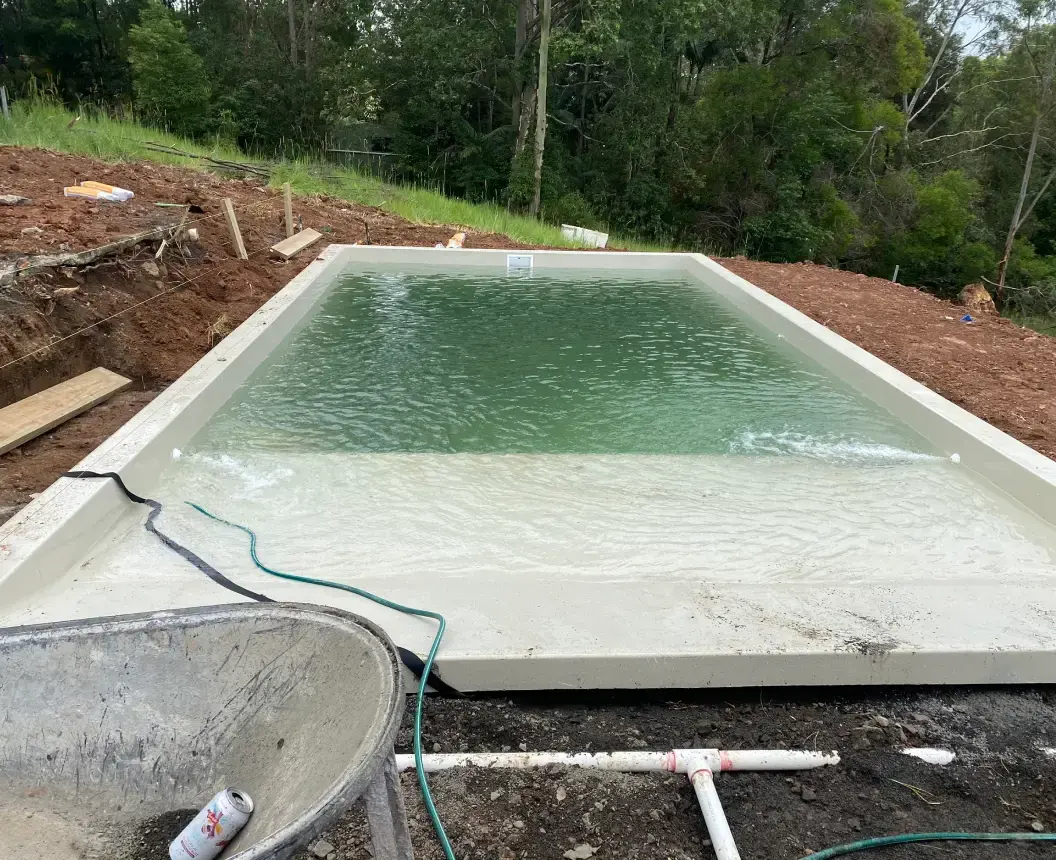
Bedding Backfill & Structural Support:
Free draining bedding material, cement stablisied backfill and structural support are key materials such as 5mm stone, crusher dust or stabilised sand create. While a concrete bond beam reinforces the pool shell and provides stability for the first row of paver. To learn more about backfill and different materials tune into our video explaining the pro's and con's of the different backfill material.
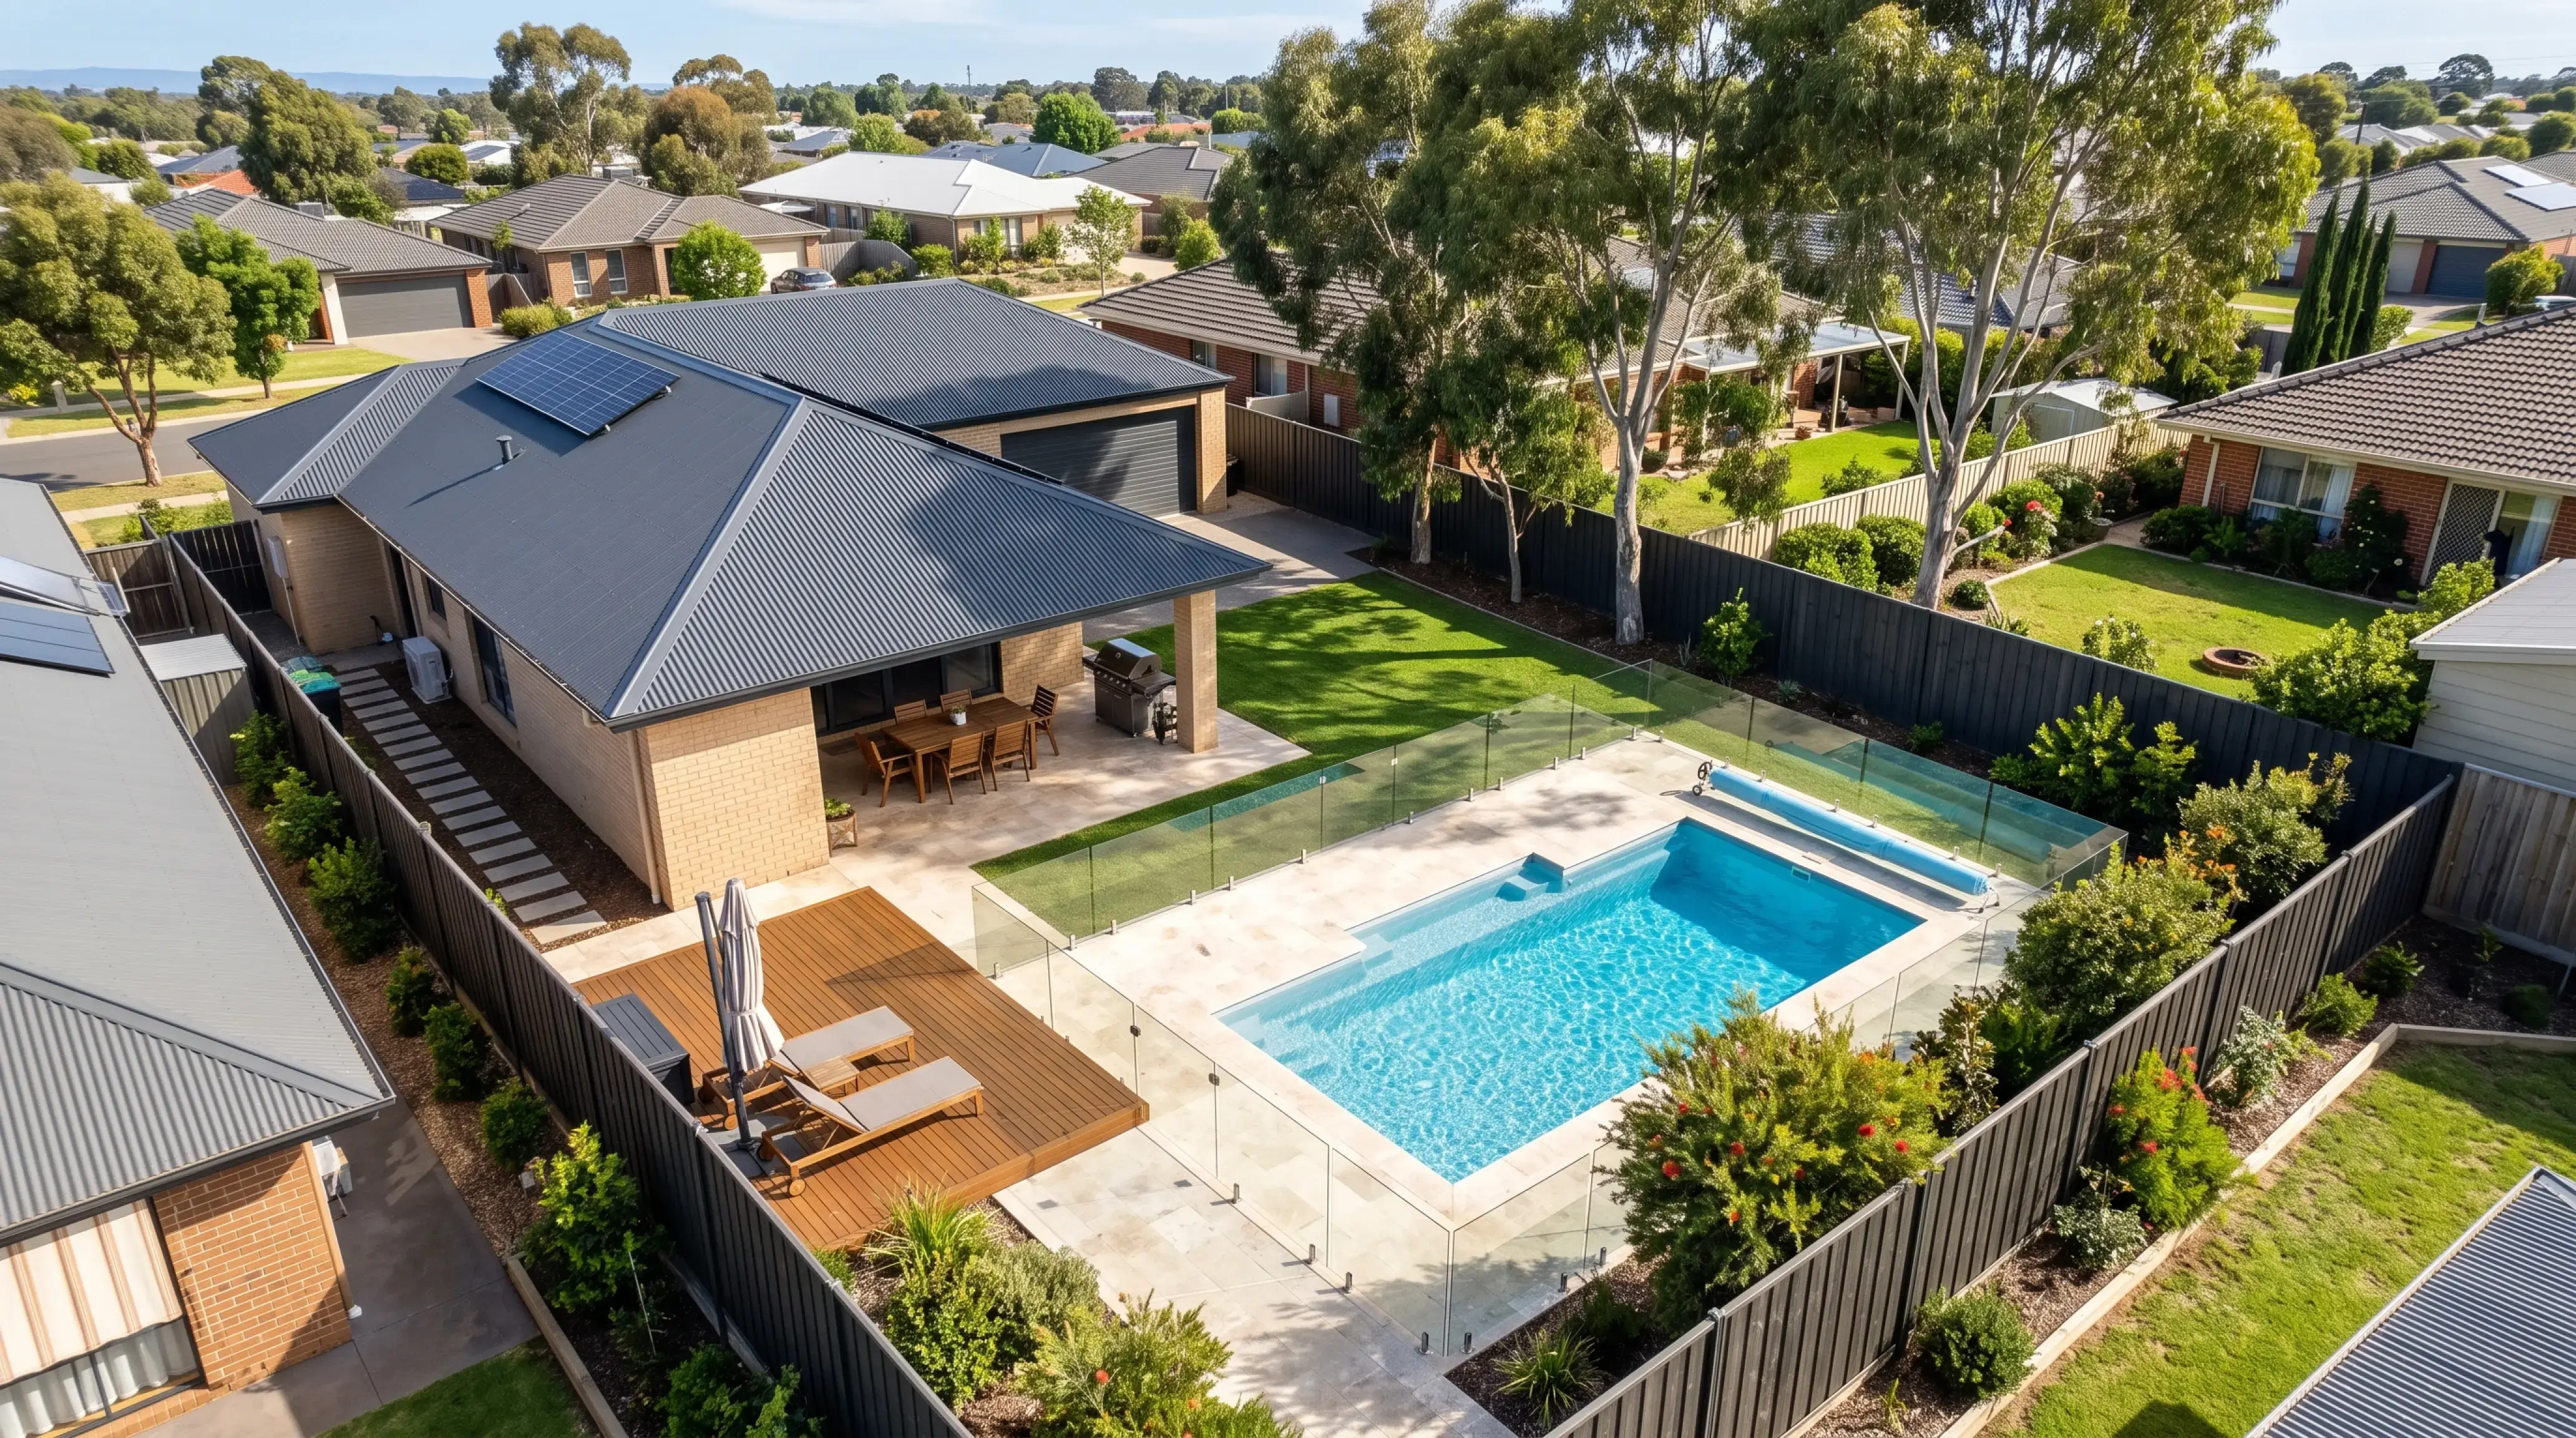
Surrounds:
To complete the installation, choose exposed aggregate concrete, decking, pavers or tiles to create a clean, stylish edge, and consider non-slip surface coatings to improve safety.
A photo showing a completed pool installation with paving etc would also work as a visual cue.
Additional Items to Enhance Your DIY Pool
Heating & Energy Efficiency
Beyond the basics, you can add additional features for comfort, efficiency, and style. Heating options like solar, electric, or gas heaters extend your swimming season, while a pool cover or roller helps retain heat and reduce evaporation.

Lighting
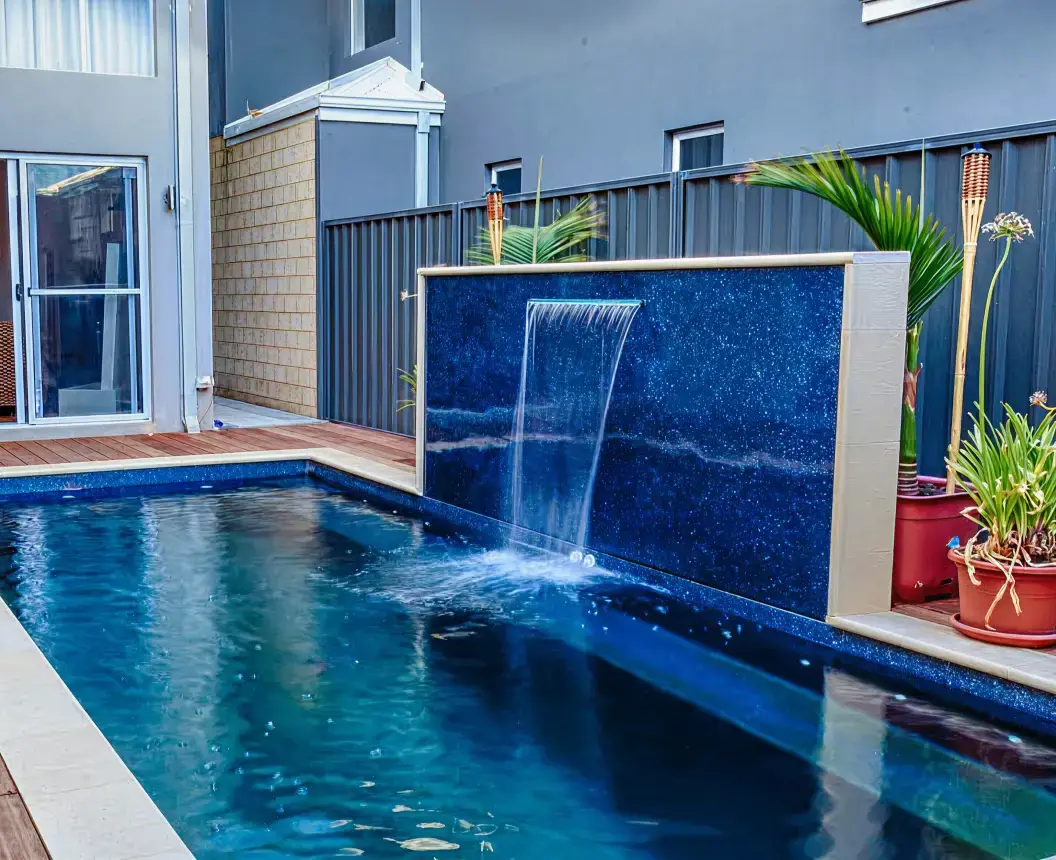
For aesthetics and ambience, LED pool lights allow for safe nighttime swimming and create a visual masterpiece, while water features such as waterfalls or deck jets add a stylish touch.
Automation and Cleaning
If convenience is a priority, pool automation lets you control filtration, heating and lighting with the touch of a button from your smartphone app. Robot pool cleaners save you hours of cleaning time and keep your pool sparkling with ease.
Safety & Compliance Supplies
Safety compliance is essential. During installation, temporary fencing is required before the permanent pool fence is in place. Your final setup must comply with Australian Standards (AS1926.1), including pool safety fences, self-closing gates, and CPR signage where required by law.
Tips for Sourcing Your DIY Pool Supplies:
- Check what’s included in your DIY pool kit – Ensure your kit includes an Australian made pump, filter and chlorinator from a manufacturer with at least 15 years experience manufacturing equipment designed for harsh Australian conditions
- Compare suppliers – Get multiple materials and equipment hire quotes to save money
- Consider a factory second fibreglass pool shell. Factory second pool shells are discounted due to minor cosmetic defects and full cosmetic and structural warranties. Never buy a factory second that do not offer the same warranties as a brand new defect free shell.
Swimming Pool Kits
A fibreglass swimming pool kit is the easiest way to install a DIY pool, providing all the essential components needed for a quick, efficient, and cost-effective installation. Choosing the right kit ensures long-term durability, low maintenance, and compliance with Australian Standards.
What’s Included in a DIY Swimming Pool Kit?
Quality DIY pool kits should come with:
- Fibreglass Pool Shell – Pre-moulded and factory-tested for strength and longevity
- Filtration System – Includes a pump, filter (sand or cartridge), and chlorinator
- Fittings – Skimmer box and return jets
- Installation videos, tip sheets, dig sheet and engineering drawings for council approval and a confident DIY installation
- Hydrostatic Valve – Prevents groundwater pressure from lifting the pool shell
- Handover Kit – manual cleaning equipment, water quality testing kit and CPR sign
- Chemical Starter Pack and Initial Dose of Pool Salt – For balancing your pool water chemistry after installation
- 7 Day Per Week Phone Support and Assistance With Sourcing Pool Installers
Benefits of Buying a fibreglass DIY Swimming Pool Kit
- Cost Savings – Avoid builder profit markups and save thousands by installing it yourself
- Faster Installation – Fibreglass pools can be installed in as little as 1 week
- Lower Maintenance – Smooth gelcoat finish reduces algae buildup, requiring fewer chemicals.
Rohan |
Complete Fibreglass Pool Kits
Always check what’s included in your DIY pool kit to avoid unexpected costs for missing components later down the road.
Karen Mooney
New South Wales
Preparing the Site
Pool Boundaries
When preparing your site for a DIY pool, understanding pool boundaries is crucial to ensure compliance with council regulations, property layout, and safety requirements. Setting the right boundaries helps avoid future legal issues, maximises available space, and ensures your pool fits seamlessly into your backyard.
Council Setback Requirements
Before you start submitting your site plan, check your local council’s pool setback regulations. These rules dictate how close your DIY pool can be to fences, structures, and neighbouring properties.
Typical Pool Boundary Regulations:
- 1m – 2m from property fences (varies by state and council)
- At least 1m - 2m from existing structures like sheds, retaining walls, or garages
- Minimum 3m from neighbouring windows or doors to maintain privacy and reduce noise complaints.
Contact your local council or private certifier to confirm specific setback rules in your area.
Easements & Underground Utilities
Before applying to council for your pool permit, it’s crucial to check for easements and underground utilities, as pools cannot be installed over major utility infrastructure. Common underground utilities to watch for include sewer and stormwater drains, electrical and gas mains, water pipes, and telecommunication cables.
How to Check for Underground Services:
Use Before You Dig Australia to locate buried utilities. If underground utilities are in the way you may need to reposition the pool or choose a smaller design to comply with regulations while still making the most of your backyard space. Planning ahead will save you time, money, and potential future headaches.
If space is limited, you can adjust your DIY pool layout by:
- Choosing a plunge pool or lap pool for narrow spaces
- Installing the pool partially above ground to reduce excavation depths
- Utilising retaining walls to create a level installation area.
Pro Tip: Plan for landscaping and fencing around the pool while ensuring enough clearance for maintenance access.
Compliance & Final Site Inspection
Once your pool boundaries are confirmed, most councils require:
- A site inspection once excavation is completed and temporary fencing is in place
- Final approval to confirm installation is compliant with the requirements of the pool permit and permanent pool fencing.
For a full guide on DIY pool boundaries and site planning, visit our resource hub: ‘DIY Plunge Pool Kit Australia - The Costs, Construction and More’.
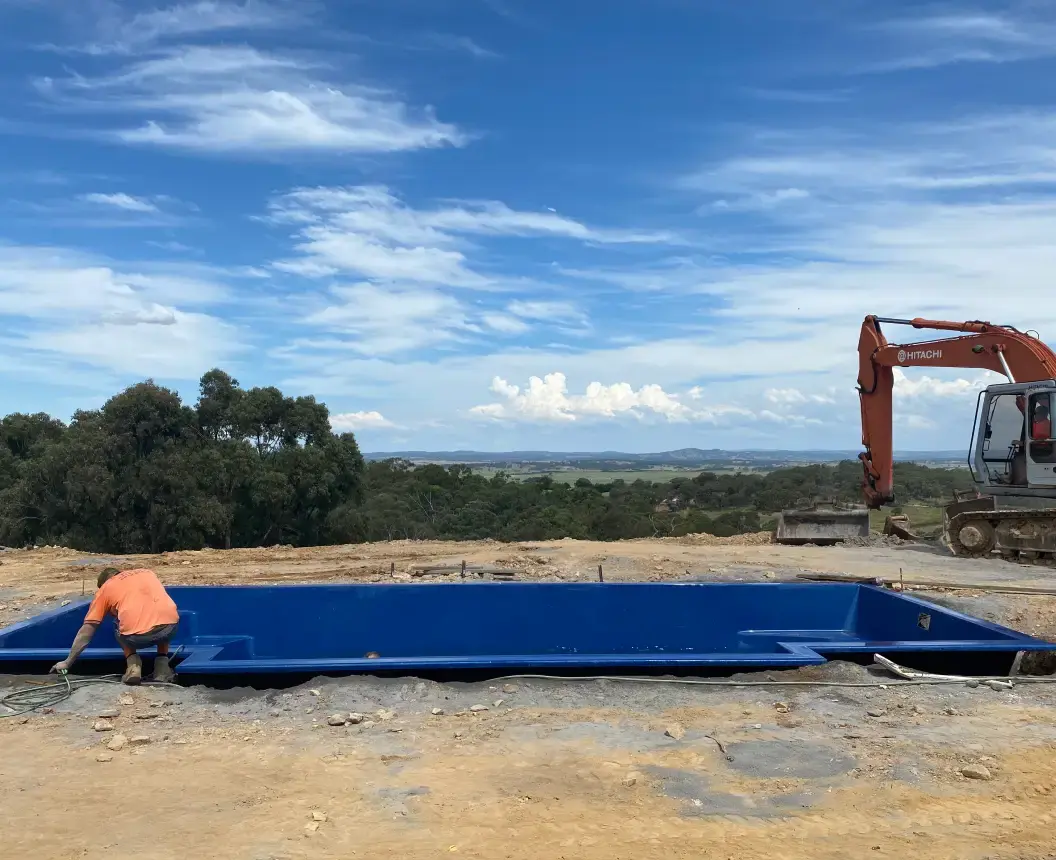
Excavation and Soil Preparation
The first rule of excavation? Don’t dig too early. You want to excavate no more than 7 days before installation to avoid collapses or turning your site into a giant mud pit if bad weather hits. Proper excavation and soil preparation are essential steps when installing a DIY pool. A well-prepared site ensures a stable foundation, prevents future shifting, and reduces the risk of structural issues.
Digging the pool hole to the appropriate depth
Properly excavating your DIY pool hole to the correct depth is crucial for drainage, and ease of installation. Digging too deep or too shallow can lead to costly adjustments and delays when lifting the pool shell into place.
Determining the Correct Excavation Depth
Your excavation depth should account for:
- The pool shell depth
- A bedding layer to the depth shown on the supplied engineering drawings
- Additional clearance for plumbing and backfilling
Step 1: Mark Out the Pool Area
- Use spray paint, stakes, or string lines to outline the exact dimensions of your pool
- Add 250mm – 300mm clearance around the edges for plumbing and backfill in sandy soil or sites with some clay content. Sites will higher levels of clay generally require more bedding and backfill which will be shown in the supplied engineering details.
Step 2: Digging to the Correct Depth
- Use an excavator and for efficient excavation
- Regularly check depth using a laser level to ensure consistency.
Step 3: Managing Uneven or Sloping Ground
- If the ground is uneven, excavate in stages, adjusting for level differences
- For sloped sites, you may need retaining walls.
Step 4: Verifying Final Depth & Level
- Check the entire base with a laser level before adding the bedding layer
- Ensure the excavated hole is uniform in depth to prevent uneven settling.
Soil Removal & Disposal
Excavation produces large amounts of excess soil that must be managed. Here are some options on how you can get rid of that unwanted or unused soil:
- Arrange for soil removal through local disposal services
- Repurpose soil for garden beds, landscaping, or leveling other areas
- Use online platforms like Fill Wanted Australia for free removal options.
By carefully digging your pool hole to the correct depth, you’ll avoid unnecessary adjustments and ensure a smooth installation for your DIY pool.
Step 5: Bedding Layer
- The bedding layer does not need to be compacted to allow for the pool to settle and future ground water drainage
- Screed the bedding layer in sections starting from the shallow end
- Regularly check levels with a laser level
Rohan |
Complete Fibreglass Pool Kits
If your yard is on a slope and your in-ground pool is more than 300mm out of the ground, you’ll need retaining walls. Not keen on extra construction? Consider a semi or fully above-ground fibreglass pool like our patented Plug 'n' Play range—it skips the need for high retaining walls and backfill altogether.
Tim Grieve
Brisbane
Drainage and Electrical Requirements
Dealing With Water Drainage Around the Pool Area
Proper water drainage is essential when installing a DIY fibreglass pool into poorly draining soil such as clay to prevent water pooling underneath and around the outside of the pool shell and surrounding paving from becoming uneven.
Why Drainage Matters for DIY Pools
- Reduces Water Pooling – Standing water around the pool can damage decking and create slip hazards
- Protects Pool Equipment – Ensures pumps and filters are not exposed to excess moisture
- Minimises Groundwater Pressure – Reduces the risk of pool lifting due to hydrostatic pressure
- Poor drainage can lead to the pool and/or surrounding paving and landscaping moving and increased weekly pool maintenance.
Effective Drainage Solutions for DIY Pools
Install a Perimeter Drainage System
- Use agricultural drains (gravel-filled trenches with perforated pipes) to redirect water away from the pool
- Position strip drains around the pool deck and low-lying areas.
Ensure Proper Pool Slope & Grading
- The area surrounding the pool should slope away from the pool to direct water runoff away from the pool
- Aim for a 1–2% gradient to allow natural drainage.
Use Retaining Walls for Sloped Yards
- If your pool is installed on a slope, consider adding a retaining wall to control runoff
- Incorporate weeping tile or drainage pipes to divert excess water.
Install a Hydrostatic Valve as Required by AS1839:2021
- A hydrostatic relief valve in the pool floor helps manage groundwater pressure
- This prevents the pool from lifting due to high water tables.
By planning effective drainage solutions, you can protect your DIY pool from erosion, shifting, and water damage, ensuring long-term durability.
Connecting Water Supply Lines to The Pool
Properly connecting the water supply lines in your DIY pool is essential for efficient filtration, circulation, and long-term functionality. A well-installed plumbing system ensures clean, safe water while preventing leaks and insufficient pressure issues.
Understanding the Pool Plumbing System
Before installing the water supply lines, it's important to understand the key components of your DIY pool plumbing system:
- Skimmer Box – Draws water from the pool into the filtration system
- Return Jets – Allows filtered water back into the pool
- Pump & Filter System – Ensures water is cleaned before returning to the pool
Top Tip: Always use Class 9 pressure pipes to prevent leaks and cracks.
Steps for Connecting Water Supply Lines to Your DIY Pool
Step 1: Plan Your Plumbing Layout
Start by planning your plumbing layout, marking where pipes will run from the pool to the filtration system. Ideally, position the pump and filter within 8m of the skimmer box to the pool to improve efficiency and reduce strain on the system. If installing the equipment further than 8m away, ensure your DIY pool company has included the correct size pump to manage the additional distance.
Step 2: Cut & Dry Fit Pipes
Once your layout is set, measure and cut Class 9 PVC pipes to the required lengths. Before applying glue, dry fit all pieces to ensure correct alignment.
Step 3: Secure Connections with Two-Part Pressure Glue
When ready, use PVC two-part pressure glue to secure each joint, pressing the fittings together for at least 10 seconds to create a watertight seal.
Step 4: Install Shut-Off Valves & Unions
For easier maintenance, install shut-off valves to control water flow and PVC unions that allow for quick disconnection if repairs are needed.
Step 5: Pressure Test the Plumbing System
Finally, before backfilling, run a pressure test for leaks. This extra step ensures a trouble-free system before completing the plumbing is covered with backfill.
Live in Western Australia? You don’t need to install a hydrostatic valve.
Watch previews of our DIY Pool videos showing the installation of the fittings and hydrostatic valve.
Electrical Requirements for Pool Pumps and Lighting
Properly setting up the electrical components of your DIY pool, including the pump, filtration system, and lighting, is essential for safety, efficiency, and compliance with Australian standards.
Key Electrical Components for a DIY Pool
To run your DIY pool efficiently, you’ll need electrical connections for:
- Chlorinator/Sanitisation System – Manages chlorine or salt levels and provides the power source for your pool pump
- Pool Heater (if applicable) – Can be solar, electric, or gas-powered
- Pool Lighting – Underwater LED lights or external landscape lighting
- Automation & Timers – Smart systems to control filtration, lighting, and heating.
Top Tip: Ensure your power supply can handle the electrical load of all components.
Electrical Safety Requirements for DIY Pools
- Any electrical work involving mains electricity or house fuses must be performed by a licensed electrician – This is a legal requirement in Australia
- Dedicated Pool Circuit – Your pool pump and lighting should be on a separate circuit with the correct voltage and amperage
- RCD (Residual Current Device) Protection – Required for all outdoor electrical installations to prevent electric shocks
- Bonding and Earthing – Ensures metal components (e.g., pool ladders, fencing, bond beam) are safely grounded / earthed
- Weatherproof Power Points – All outlets must be IP-rated for outdoor use.
Installing Pool Lighting
- Underwater Pool Lights – Use low-voltage LED lights (12V or 24V) for safety and efficiency
- Deck & Landscape Lighting – Waterproof fixtures should be positioned safely away from water splashes
- Remote & Smart Controls – Wireless systems allow you to adjust lighting remotely and reduce’s future maintenance.
For more on all things lights for your DIY pool read our ‘Pool Lights - The Best Ways to Light Your DIY Pool’.
Hiring a Licensed Electrician for DIY Pools
Since DIY electrical work is illegal, always hire a licensed electrician to:
- Install dedicated power circuits for the pool pump and accessories
- Ensure compliance with AS/NZS 3000: Electrical Installations
- Connect and test all electrical components before use.
Hayley Ryan
South Australia
Installation Support
Finding a Reliable and Experienced Pool Contractor
Whether you are installing the pool yourself or getting a hand from an installer, you may need professional assistance for excavation, electrical work, plumbing or final inspections. Hiring a reliable and experienced contractor ensures your pool meets Australian Standards and avoids costly mistakes.
When Do You Need a Pool Contractor for a DIY Pool?
While many steps in a DIY pool installation can be done yourself, some tasks require licensed professionals such as:
- Electrical Work (Mandatory by Law) – All pool pumps, lights, and automation systems must be installed by a licensed electrician
- Final Inspections & Compliance Checks – Helps meet council approvals and safety regulations
- Plumbing – when a connection from your filter to mains sewer is required.
How to Find a Trustworthy Pool Contractor
Choosing the right contractor for your DIY pool installation is crucial to ensuring a smooth and professional job. Here are some top tips on how to find some of the best in the business near you:
Ask for Recommendations & Reviews
Start by checking online reviews on Google, Facebook, and local trade directories to see what past customers have experienced. Even better, ask friends, family, or previous customers for direct recommendations—they’ll give you honest feedback.
Verify Licensing & Insurance
Before hiring, verify licensing and insurance to ensure the contractor is qualified for pool-related excavation, plumbing, or electrical work in your state. They should also have public liability insurance to protect against accidents or property damage.
Get Multiple Quotes & Compare Services
Always get multiple quotes—at least three—to compare pricing, services, and inclusions. A good contractor will offer transparent pricing with no hidden costs, so watch out for vague estimates.
Check Past Projects & Experience
Finally, ask to see a portfolio of past work, particularly fibreglass pool installations, to confirm they have the right experience for your project.
Once you have established your reliable contractor it is also worthwhile asking some of these questions for peace of mind:
- How many fibreglass pools have you installed?
- Do you handle council approvals, or will I need to manage them?
- What type of warranty do you offer on your work?
- How do you manage unexpected issues like rocky soil or high water tables?
How a Contractor Can Assist With Complex Tasks
While a DIY pool offers cost savings and flexibility, some you may choose to hire a contractor for some of the stages in your project.
1. Excavation & Site Preparation
Why It’s Complex:
- The pool hole must be dug to precise dimensions with allowances for backfilling
- Unstable soil, underground rocks, or high water tables require specialist handling
- Incorrect excavation can lead to pool shell misalignment or sinking.
How a Contractor Helps:
- Uses excavation machinery suited to your backyard’s space and soil type
- Ensures proper depth, shape, and slope to match the pool shell
- Can arrange soil removal and disposal, saving you time and effort.
2. Electrical Work (Legally Required to Be Done by a Licensed Electrician)
Why It's Complex:
- Australian regulations require all pool electrical work to be performed by a licensed electrician
- Pool pumps, lighting, and automation need dedicated power circuits and safety switches.
How a Contractor Helps:
- Installs weatherproof, RCD-protected outlets for pool equipment
- Ensures safe wiring for pool lights, heaters, and automation systems
- Completes a compliance certificate, ensuring legal installation.
3. Council Approvals & Final Inspections
Why It's Complex:
- Pool installations must meet council setback, fencing, and drainage requirements
- A final inspection is required after your pool and permanent fencing has been installed.
How a Contractor Helps:
- Assists with approval paperwork
- Ensures fencing, drainage, and installation comply with local regulations
- Helps organise a certifier to inspect and approve the pool before use.
The Right Balance of DIY & Professional Help
Even if you’re managing most of your DIY pool installation, hiring a contractor for complex tasks ensures:
- Faster, hassle-free installation
- Compliance with legal and safety standards
- Long-term durability and peace of mind
The Perfect DIY & Contractor Partnership
By strategically collaborating with professionals, you can enjoy the cost savings of a DIY pool while ensuring expert assistance for critical tasks. A well-planned DIY-contractor partnership leads to a successful, stress-free pool installation. To learn more about making the right choice when it comes to hiring a contractor, check out all you need to know with our ‘DIY Plunge Pool Kit Australia - The Costs, Construction and More’.
What’s Next? Your DIY Pool Journey Starts Now
- Need a confidence boost? Watch our timelapse video below to see just how achievable it is!
- Want expert advice? Our team is here to help with planning, equipment, and guidance. Contact us today.
- Ready to start? Explore our DIY fibreglass pool kits today.
Rohan |
Complete Fibreglass Pool Kits
A DIY pool is within your reach. All you need is the right plan, the right support, and the confidence to get started. And now—you’ve got all three.
Rohan Taylor
Author

Join our fortnightly DIY pool planner email
Sign up for the very best DIY pool content, delivered twice a month.
We care about your data in our privacy policy.
What’s Next
Hidden Costs of Pool Ownership in Australia (2026 Edition)
The brochure price gets you most of the way to the truth. The res...
What's in a Fibreglass Pool Quote (And What's Not)
A “fibreglass pool quote” can mean three completely different thi...

Pool Running Costs Per Year in Australia (2026)
Build cost is the conversation everyone has. Running cost is the ...
How Fibreglass Pools Affect Property Value
Thinking about adding a pool but wondering if it actually pays off?
Pool Finance in Australia: Loans vs Redraw vs Personal Loans (2026)
Many pool buyers focus heavily on build cost but underestimate th...
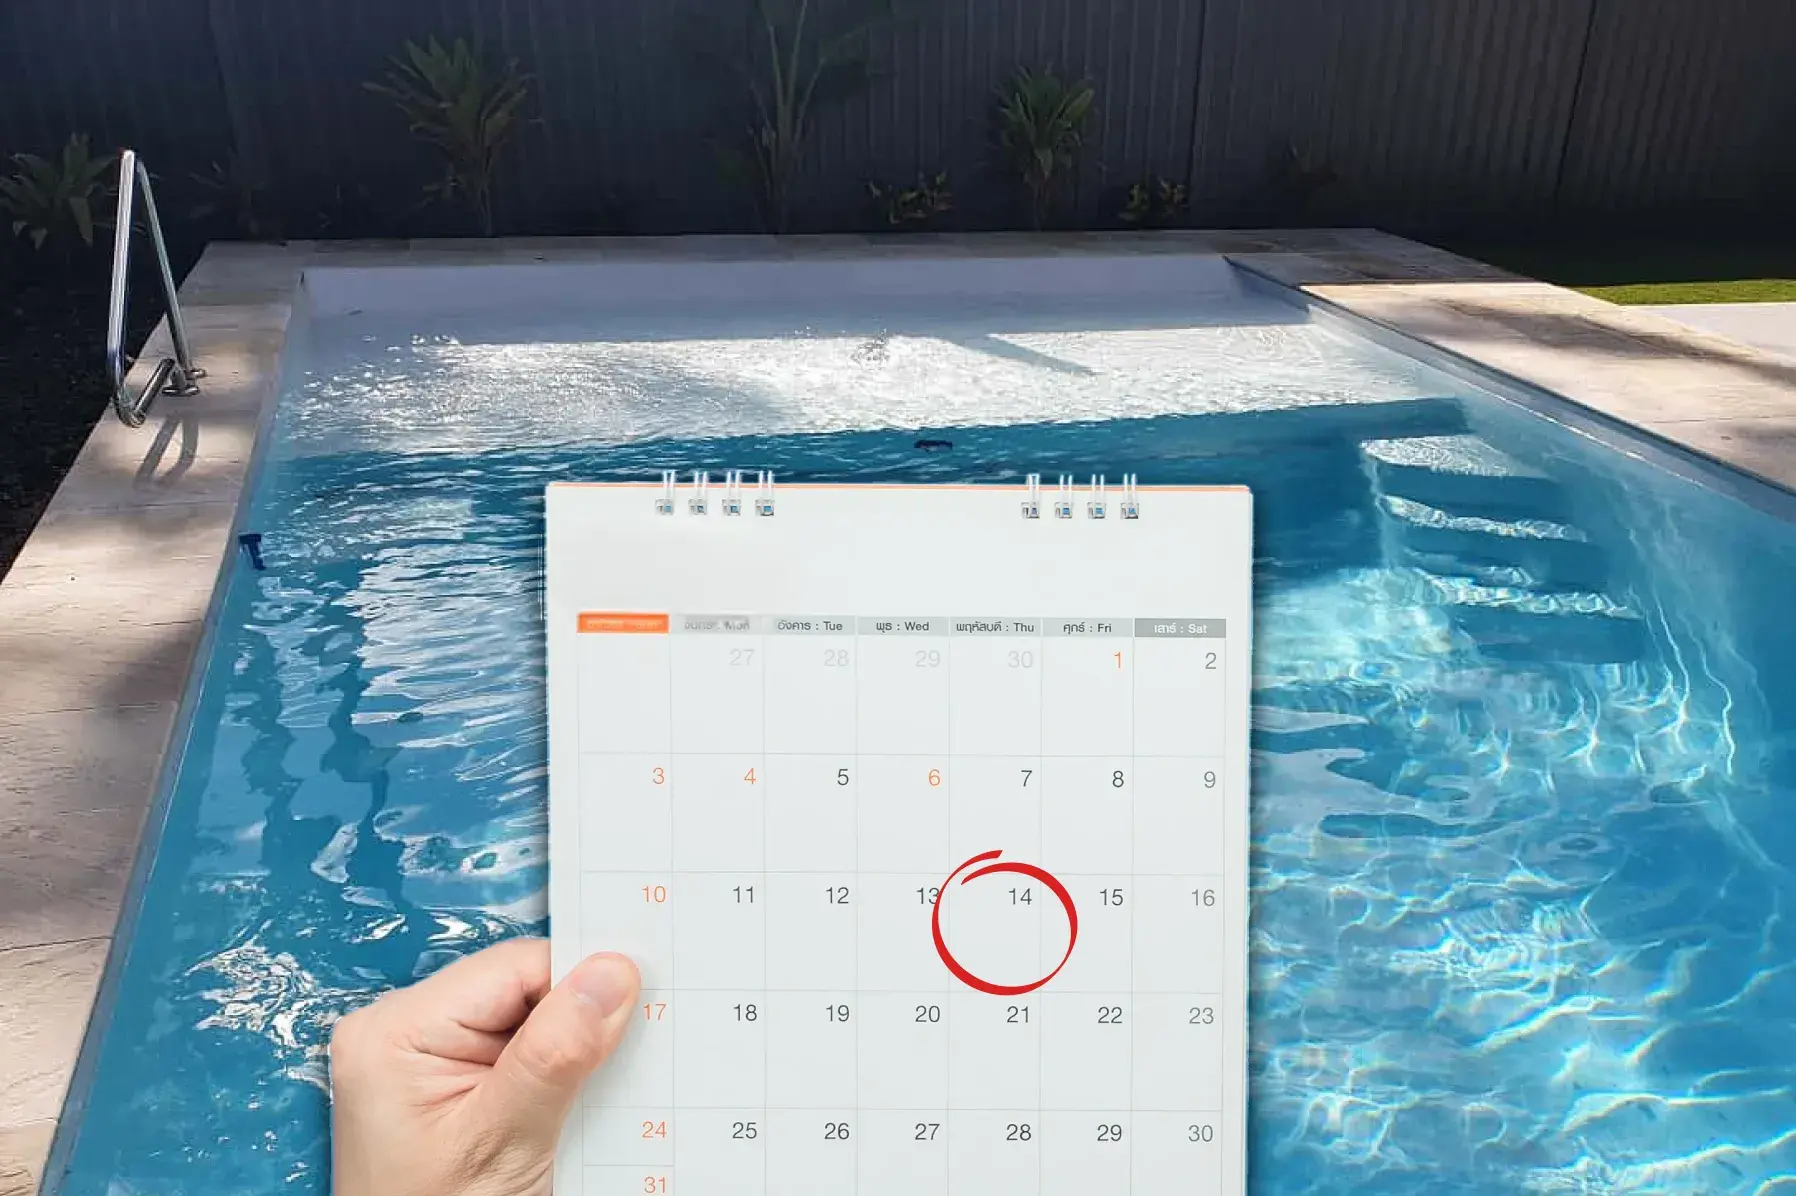
Best Time of Year to Buy a Pool in Australia (Seasonal Pricing Guide 2026)
Many pool buyers do not realise the best-value months to sign a p...
Complete Fibreglass Pool Cost Guide Australia, 2026 Edition
How much does a fibreglass pool actually cost in Australia?
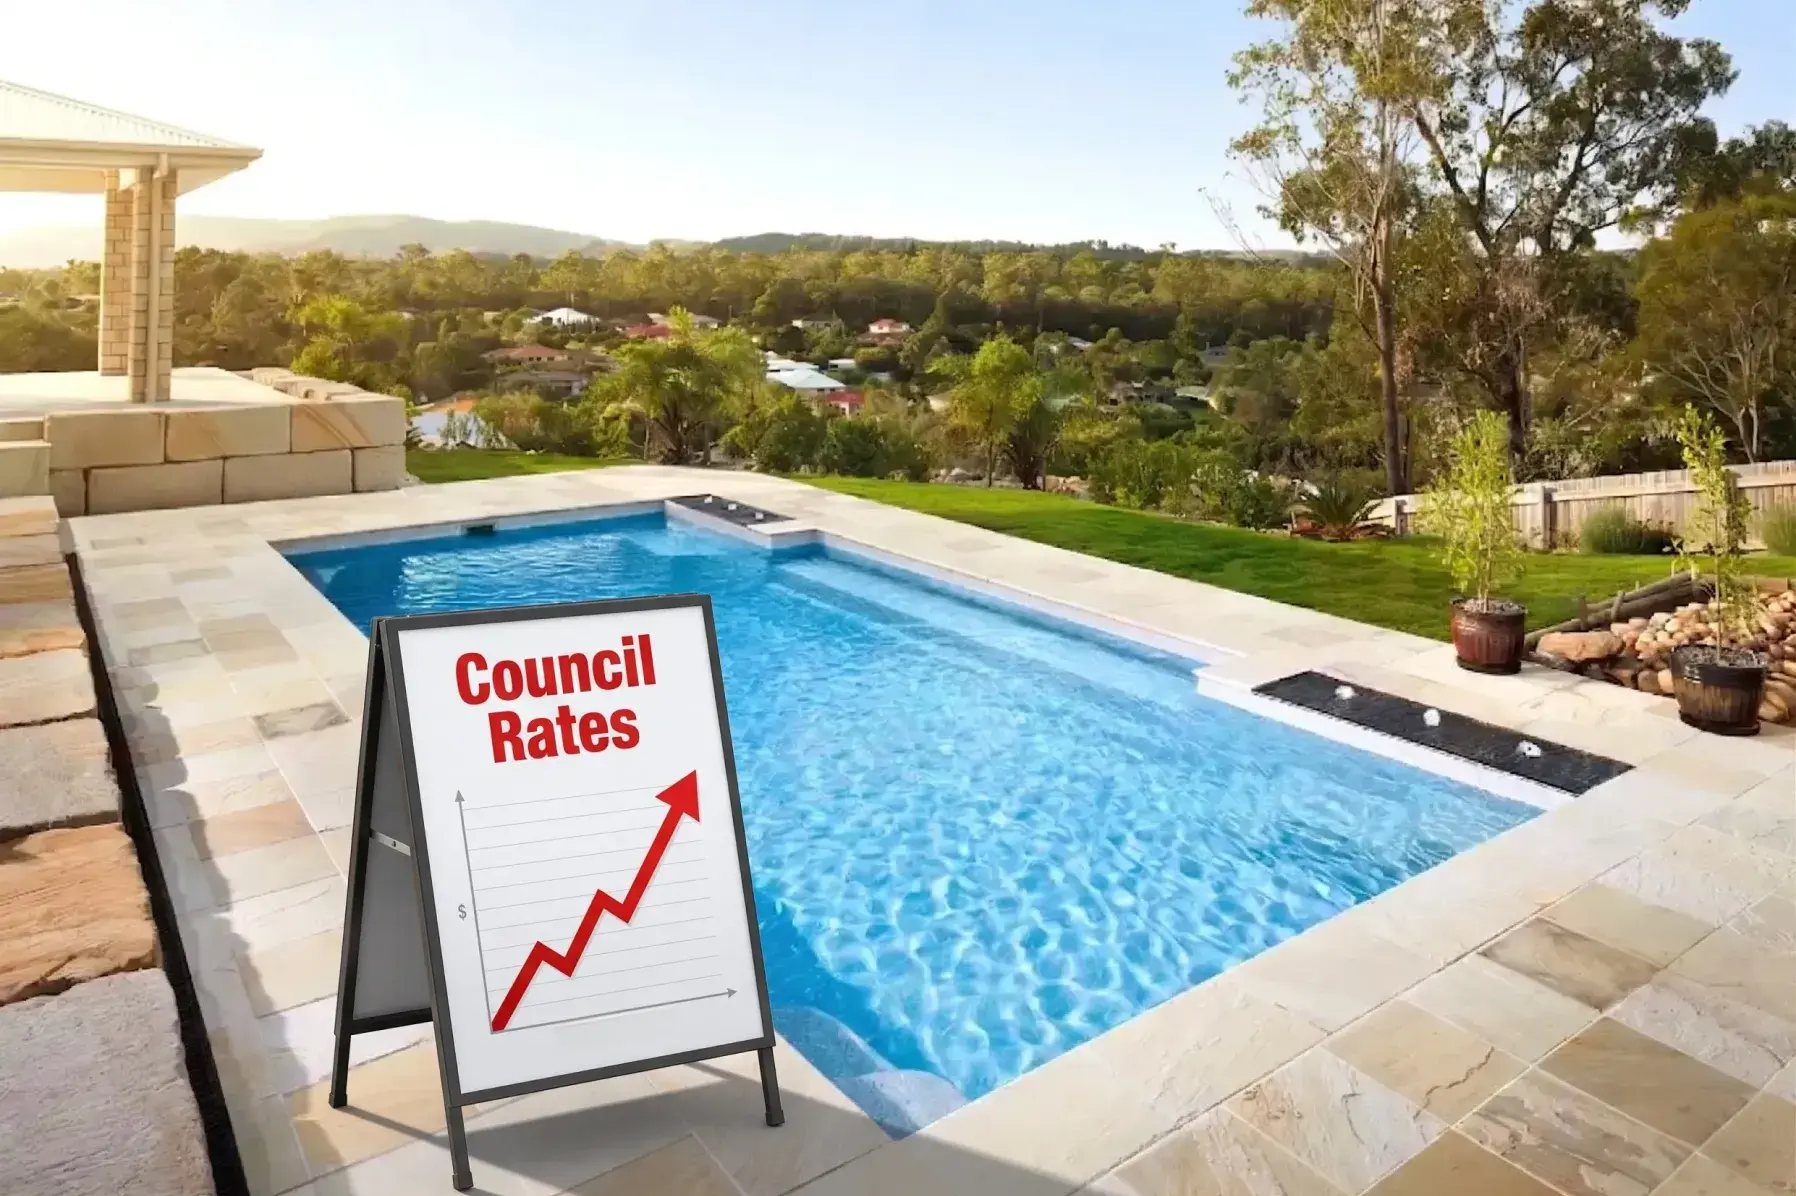
Council Rates and Insurance: How Much Will They Increase?
You’ve been dreaming about it for years - summer arvo BBQs, the k...
Why Pool Prices Vary Between Installers (And the Red Flags to Avoid)
Three pool quotes for what looks like the same fibreglass pool can come back $30,000 apart. Th...
How Long Does a Fibreglass Pool Installation Really Take? The Honest Timeline
Seven days. That's the number that tends to circulate online, and technically, for the physical a...